Gluten Free
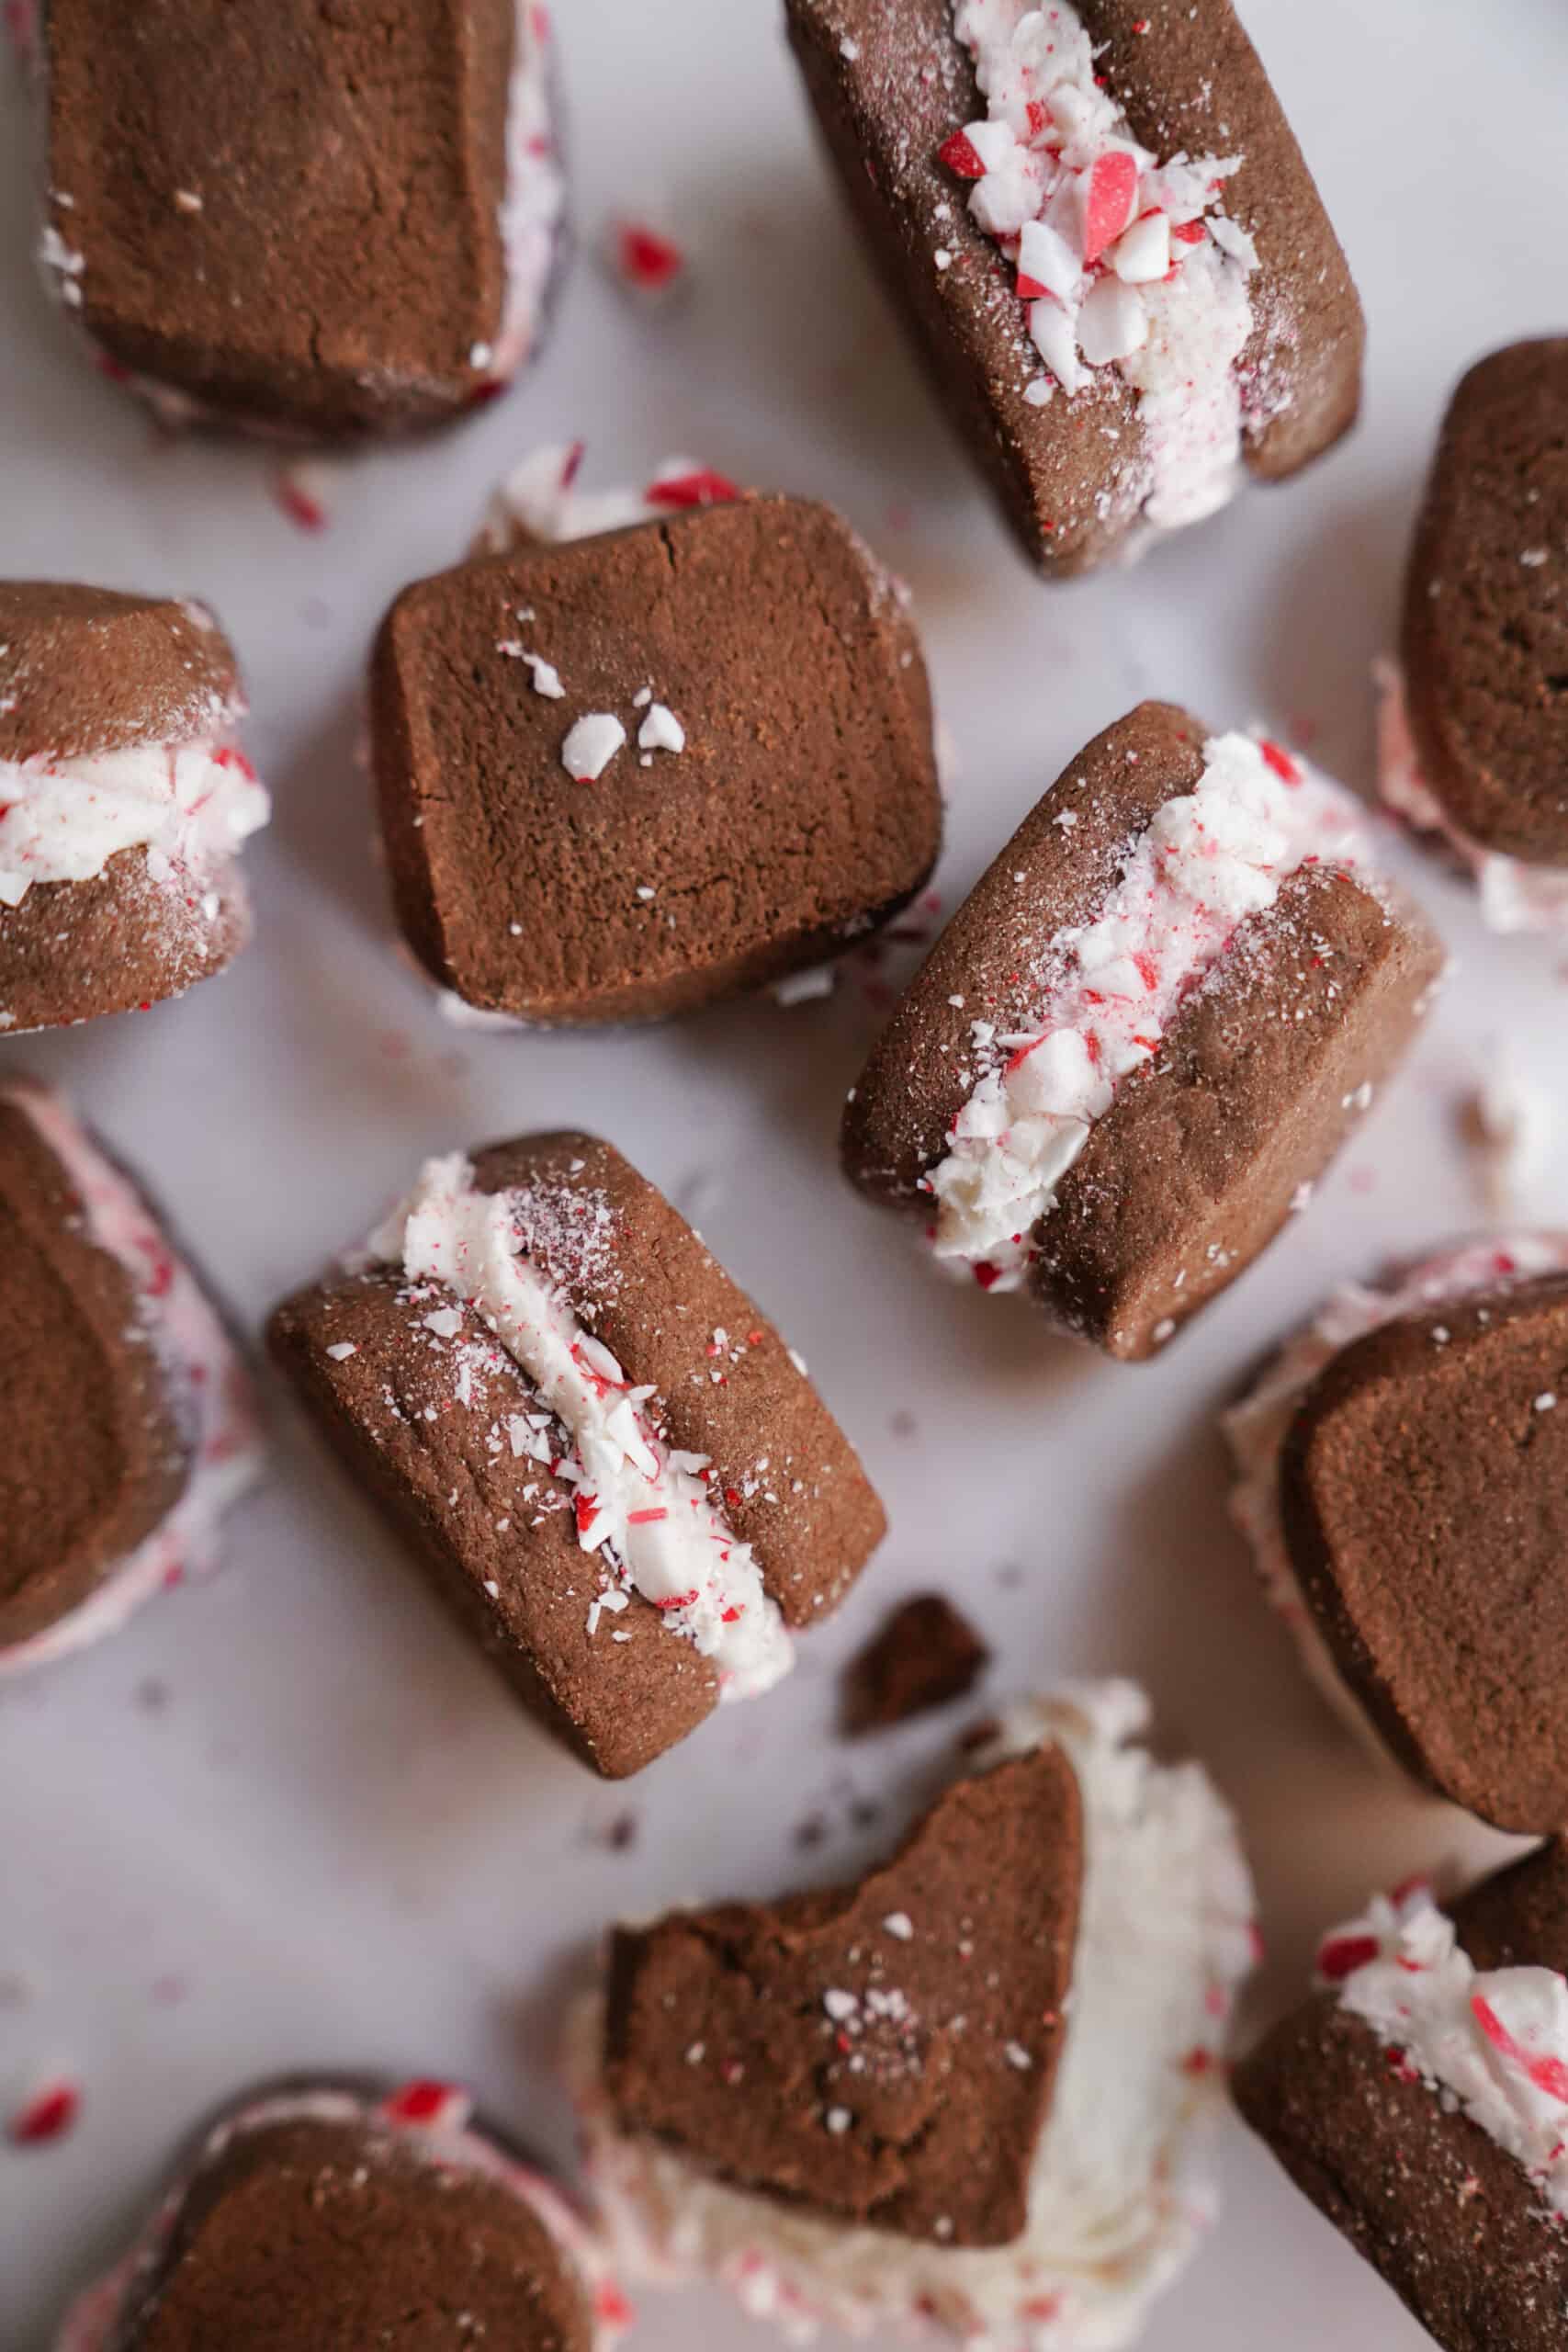
Cookie Sandwich Recipe (Vanilla Buttercream)

Prep
30 minutes
Cook
25 minutes
Yield
14 -16
🍪 This cookie sandwich recipe makes beautiful gluten-free sandwich cookies with vanilla buttercream, peppermint, and chocolate! Perfect holiday treat in under an hour!
This gluten-free sandwich cookie recipe is the perfect addition to your holiday cookie rotation because it combines delicious vanilla buttercream filling with a festive chocolate candy cane twist. These sugar cookie sandwiches are incredibly beautiful on a platter or packaged as gifts, and they taste just as amazing as they look. Whether you’re making vanilla sandwich cookies for a holiday party or just because you’re craving something special, this recipe delivers bakery-quality results that will impress everyone.
❤️ Why You’ll Love This Cookie Sandwich Recipe
- Surprisingly Easy: These may look fancy and professional, but you can make them in under an hour with simple techniques.
- Incredibly Delicious: The mix of creamy buttercream icing, cool peppermint, and rich chocolate is absolutely perfect together.
- Stunningly Beautiful: These look gorgeous on a platter or packaged as gifts because the presentation is naturally elegant.
- Gluten-Free Friendly: Made with Bob’s Red Mill 1:1 flour, so everyone can enjoy them without compromise.

🍲 Ingredients
Bob’s Red Mill 1:1 Gluten-Free Flour – This flour substitute is absolutely foolproof because it’s a true 1-to-1 replacement for all-purpose flour with no math or guesswork required. Many gluten-free flours require complicated conversions and adjustments that can ruin your baking if you get them wrong, but this blend is specially formulated to work exactly like regular flour. It contains a mix of rice flour, potato starch, and xanthan gum that mimics the structure gluten provides, so your cookies turn out crisp, tender, and delicious every time.
Peppermint Extract – This concentrated herbal extract is made from peppermint leaves and their essential oils, so it delivers that strong, refreshing peppermint taste we all love in holiday baking. Unlike peppermint flavoring which can taste artificial, pure peppermint extract provides authentic minty flavor that pairs beautifully with chocolate and vanilla. A little goes a long way because it’s very potent, so you can always adjust to your taste preference.
👩🍳 How to Make This Cookie Sandwich Recipe
Prepare the Cookie Dough:
1. Preheat the oven to 300°F and line 2 baking trays with parchment paper, so the delicate cookies won’t stick and cleanup is easy.
2. In a medium-sized bowl, use a stand or hand mixer to cream the butter on high speed until it becomes light and fluffy, about 2-3 minutes. Add the vanilla, powdered sugar, gluten-free flour, and cocoa powder, then beat on medium speed until the dough holds together in a cohesive mass, about 3 minutes total. The dough should be smooth but not sticky.
3. Divide the dough into 2 equal portions and roll each into a log approximately 2 inches in width, trying to keep the logs as uniform as possible because this creates evenly-sized cookies.
Wrap each log tightly in plastic wrap and refrigerate for 20-30 minutes until firm, so the dough is easier to slice cleanly without crumbling.
4. Remove the cookie dough logs from the fridge and gently press all four sides against the counter to create a square or rectangular shape instead of round, which gives you prettier, more uniform sandwich cookies.
Cut and Bake:
5. Unwrap the logs from plastic wrap and, using a sharp knife, cut cookies ¼-inch thick. Place them onto the prepared baking sheets about 1-2 inches apart because they don’t spread much during baking.
6. Bake for 25 minutes until the cookies are set and firm to the touch, but they may not look golden because of the gluten-free flour.
7. Allow the cookies to cool on the baking sheets for 5 minutes until they firm up slightly, then carefully transfer them to a wire rack to cool completely because they’re fragile when hot.
Make Filling and Assemble:
8. While the cookies cool, prepare your peppermint buttercream icing. Whip the softened butter in a medium bowl on high speed until light and fluffy, about 2 minutes. Add the powdered sugar, milk, vanilla, and peppermint extract, then beat on medium-high speed until fully incorporated, light, and fluffy. Taste and adjust the peppermint flavor to your preference. To assemble, fit a piping bag with a medium-sized star tip and fill with the buttercream. On half of the cooled cookies, pipe icing generously over the entire top surface, starting by going around the edges to create a dam, then filling in the center. Place the second half of the cookies on top of the iced cookies, pressing gently until the filling reaches the edges.
Decorate with Candy Canes and Chocolate:
9. Crush your candy canes into small pieces using a food processor or by placing them in a ziplock bag and crushing with a rolling pin. Transfer to a small bowl. One by one, gently press each side of the assembled cookie into the crushed candy cane pieces, or alternatively, pick up the candy cane pieces by hand and carefully press them into the peppermint icing around the edges. Repeat until all cookies are coated.
10. Add the dark chocolate to a microwave-safe bowl and melt slowly in 15-20 second intervals, stirring between each, until completely smooth. Using a small spoon, drizzle diagonal lines of melted chocolate completely over the top of your cookies, or alternatively, dip just the sides in the chocolate for a different look. Sprinkle any extra crushed candy cane pieces on top if desired while the chocolate is still wet, so they stick.

🪄 Tips and Tricks
- Uniform Size: Roll logs to consistent width and chill thoroughly because this makes slicing even cookies much easier.
- Cool Completely: Cookies must be completely cool before filling, or the buttercream will melt and slide out.
- Buttercream Dam: Pipe around the edges first to create a barrier, then fill the center so the filling doesn’t squish out when sandwiched.
- Sharp Knife: Use a sharp, thin knife and wipe it clean between cuts for the cleanest cookie slices.
🗒 Variations
- Sugar Cookie Base: Use plain sugar cookie dough without cocoa for classic vanilla sandwich cookies that show off colorful fillings.
- Sprinkle Rims: Roll the filling edges in rainbow sprinkles, mini chocolate chips, or chopped nuts instead of candy canes.
- Jam Centers: Pipe a buttercream dam around the edges and fill the center with raspberry, strawberry, or apricot jam.
- Lemon Cream: Add lemon zest and lemon extract to the buttercream for bright, citrusy sandwich cookies.
🗒 Substitutions
- Vegan Option: Use plant-based butter and plant-based milk in both the cookies and filling because most vegan butters work well in this recipe.
- Flavor Swaps: Replace peppermint extract with vanilla, almond, orange, lemon, or espresso extract and skip the candy canes for different flavor profiles.
- Regular Flour: Use 1:1 ratio of all-purpose flour if you don’t need gluten-free, though the texture will be slightly different.
- Filling Variations: Try cream cheese frosting for tang, chocolate ganache for richness, or jam for fruity sweetness instead of buttercream.
🍽️ Best served with
- How to Make Sugar Cookies (Soft or Cut-Out)
- Brown Butter + White Chocolate Snickerdoodle Cookie Recipe
- Cookie Dough Recipe (Small-Batch or Edible Option)
👝 How to Store Leftovers
Store assembled sandwich cookies at room temperature in an airtight container for 2-3 days or refrigerate for 5-7 days because the buttercream stays fresher when chilled. For longer storage, freeze unfilled cookie shells in airtight containers for up to 2 months, then thaw, fill, and decorate when ready to serve. Assembled cookies can also be frozen for 2-3 months, but place parchment paper between layers so they don’t stick together. Thaw at room temperature for 30 minutes before serving.
🤔 Common Questions
Sugar cookies, chocolate cookies, and snickerdoodles work perfectly because they’re sturdy enough to hold filling without breaking. Avoid soft, cake-like cookies that crumble easily.
Roll to ¼-inch thickness for the best balance of sturdiness and tenderness. Thicker cookies are too bulky when sandwiched, while thinner ones break easily.
Buttercream is most stable at room temperature and pipes beautifully, cream cheese frosting adds tanginess but needs refrigeration, and ganache is rich but can be messy. Choose based on storage and flavor preference.
Not necessarily, but chilling for 15-30 minutes helps the filling set and makes them easier to eat without squishing. Buttercream-filled cookies can sit at room temperature for several hours.
Pipe a buttercream dam around the cookie edges first, fill the center, and don’t overfill. Also, let cookies cool completely before filling because warm cookies melt the buttercream.
Store at room temperature for 2-3 days or refrigerate for 5-7 days. Freeze unfilled shells for up to 2 months or assembled cookies for 2-3 months with parchment between layers.
Yes! Bake cookies up to 3 days ahead and store unfilled, or freeze for up to 2 months. Fill and decorate 1-2 days before serving for the freshest taste.

Cookie Sandwich Recipe (Vanilla Buttercream)
Ingredients
- ¾ cup butter softened
- ¾ cup icing sugar
- 1 tbsp vanilla
- 6 tbsp cocoa powder
- 1 1/3 cup Bob’s Red Mill 1:1 GF Flour Blend
Peppermint Icing:
- ¼ cup butter softened
- 2 ½ cup granulated sugar
- 2 tbsp milk or plant-based milk
- 1 tsp vanilla
- Half or 1/8 tsp peppermint extract
- 2 crushed candy canes
- ½ cup dark chocolate
Instructions
- Preheat the oven to 300F, and line 2 baking trays with parchment paper.
- In a medium-sized bowl, use a stand or hand mixer to cream butter until light + fluffy. Add the vanilla, icing sugar, gluten-free flour, and cocoa powder. Beat until the dough holds together, about 3 minutes.
- In a large bowl, combine butter and oil, with a hand mixer for 2 minutes until thoroughly combined. Split the dough into 2 and roll into 2 logs, approximately 2 inches in width.
- Wrap in plastic wrap and refrigerate for 20 – 30 minutes.
- Remove the cookie dough logs from the fridge and gently press all sides into the counter to create a square or rectangle shape.
- Unwrap from plastic, and using a sharp knife, cut cookies ¼ inch thick and place onto baking sheets about 1 – 2 inches apart.
- Bake for 25 minutes, until set.
- Allow cooking for 5 minutes before moving them to a wire rack.
- While the cookies cook prepare your peppermint icing. Whip your softened butter on high speed until light and fluffy, about 2 minutes. Add the icing sugar, milk, vanilla, and peppermint extract and beat on medium-high speed until fully incorporated, light, and fluffy. Adjust the flavor to your preference. To assemble, prepare a piping bag with a medium-sized star tip. On top of half of the cooled cookies, pipe icing on the entire top. Start by going around the edges and make your way in when piping. Place the second half of the cookies on top of the iced cookies.
- Next, crush your candy canes into small pieces. Add into a small bowl. One-by-one press each side of a cookie into the crushed candy cane pieces- or pick up the candy cane pieces by hand and press them into the peppermint icing. Repeat the steps until completed all of the cookies. Afterward, add the dark chocolate to a small bowl and slowly melt it in the microwave.
- Using a small spoon, drizzle diagonal lines of chocolate completely over the top of your cookies OR dip the sides in the chocolate. Sprinkle any extra crushed candy cane pieces on top if you desire.


In step 3 it says combine butter and oil. What butter and oil? No oil is listed in the ingredients.
This is now my new favourite cookie recipe! I will definitely be making these every year at Christmas! They are so good!!! The most amazing mint chocolate flavour.
so glad you enjoyed these my friend!
I wonder if I could change the flavor from peppermint to something else, we aren’t big fans of peppermint, what do you think of orange? How would you do it?
that would work too!! Have fun with it!!!! then do chocolate drizzling instead of the crushed candy cane!
Can’t wait to make these Christmas Eve. I love your recipes and blog posts, they are so informative and easy to follow!! Thank you, Merry early Christmas!
thank you so much!!! HAPPY HOLIDAYS!
These are the best cookies. I love the combination of chocolate and peppermint. The kids loved them and they were fun to make!
makes me so happy!
It’s my first time posting a review, but these cookies are amazing!! One of my seasonal favorites, a really good holiday recipe!
thank you so much for the love, Judy!
These cookies were soo good. Fun and easy to make. I didn’t have any candy cane, I crushed other candy that I have which works just as well! I will definitely make these again.
that sounds great!!
Can I make this the night before and refrigerate it to bake the next day? I have a cookie exchange to go to and want them to be fresh. Can’t wait to make these!
yes! That will work!