Holidays
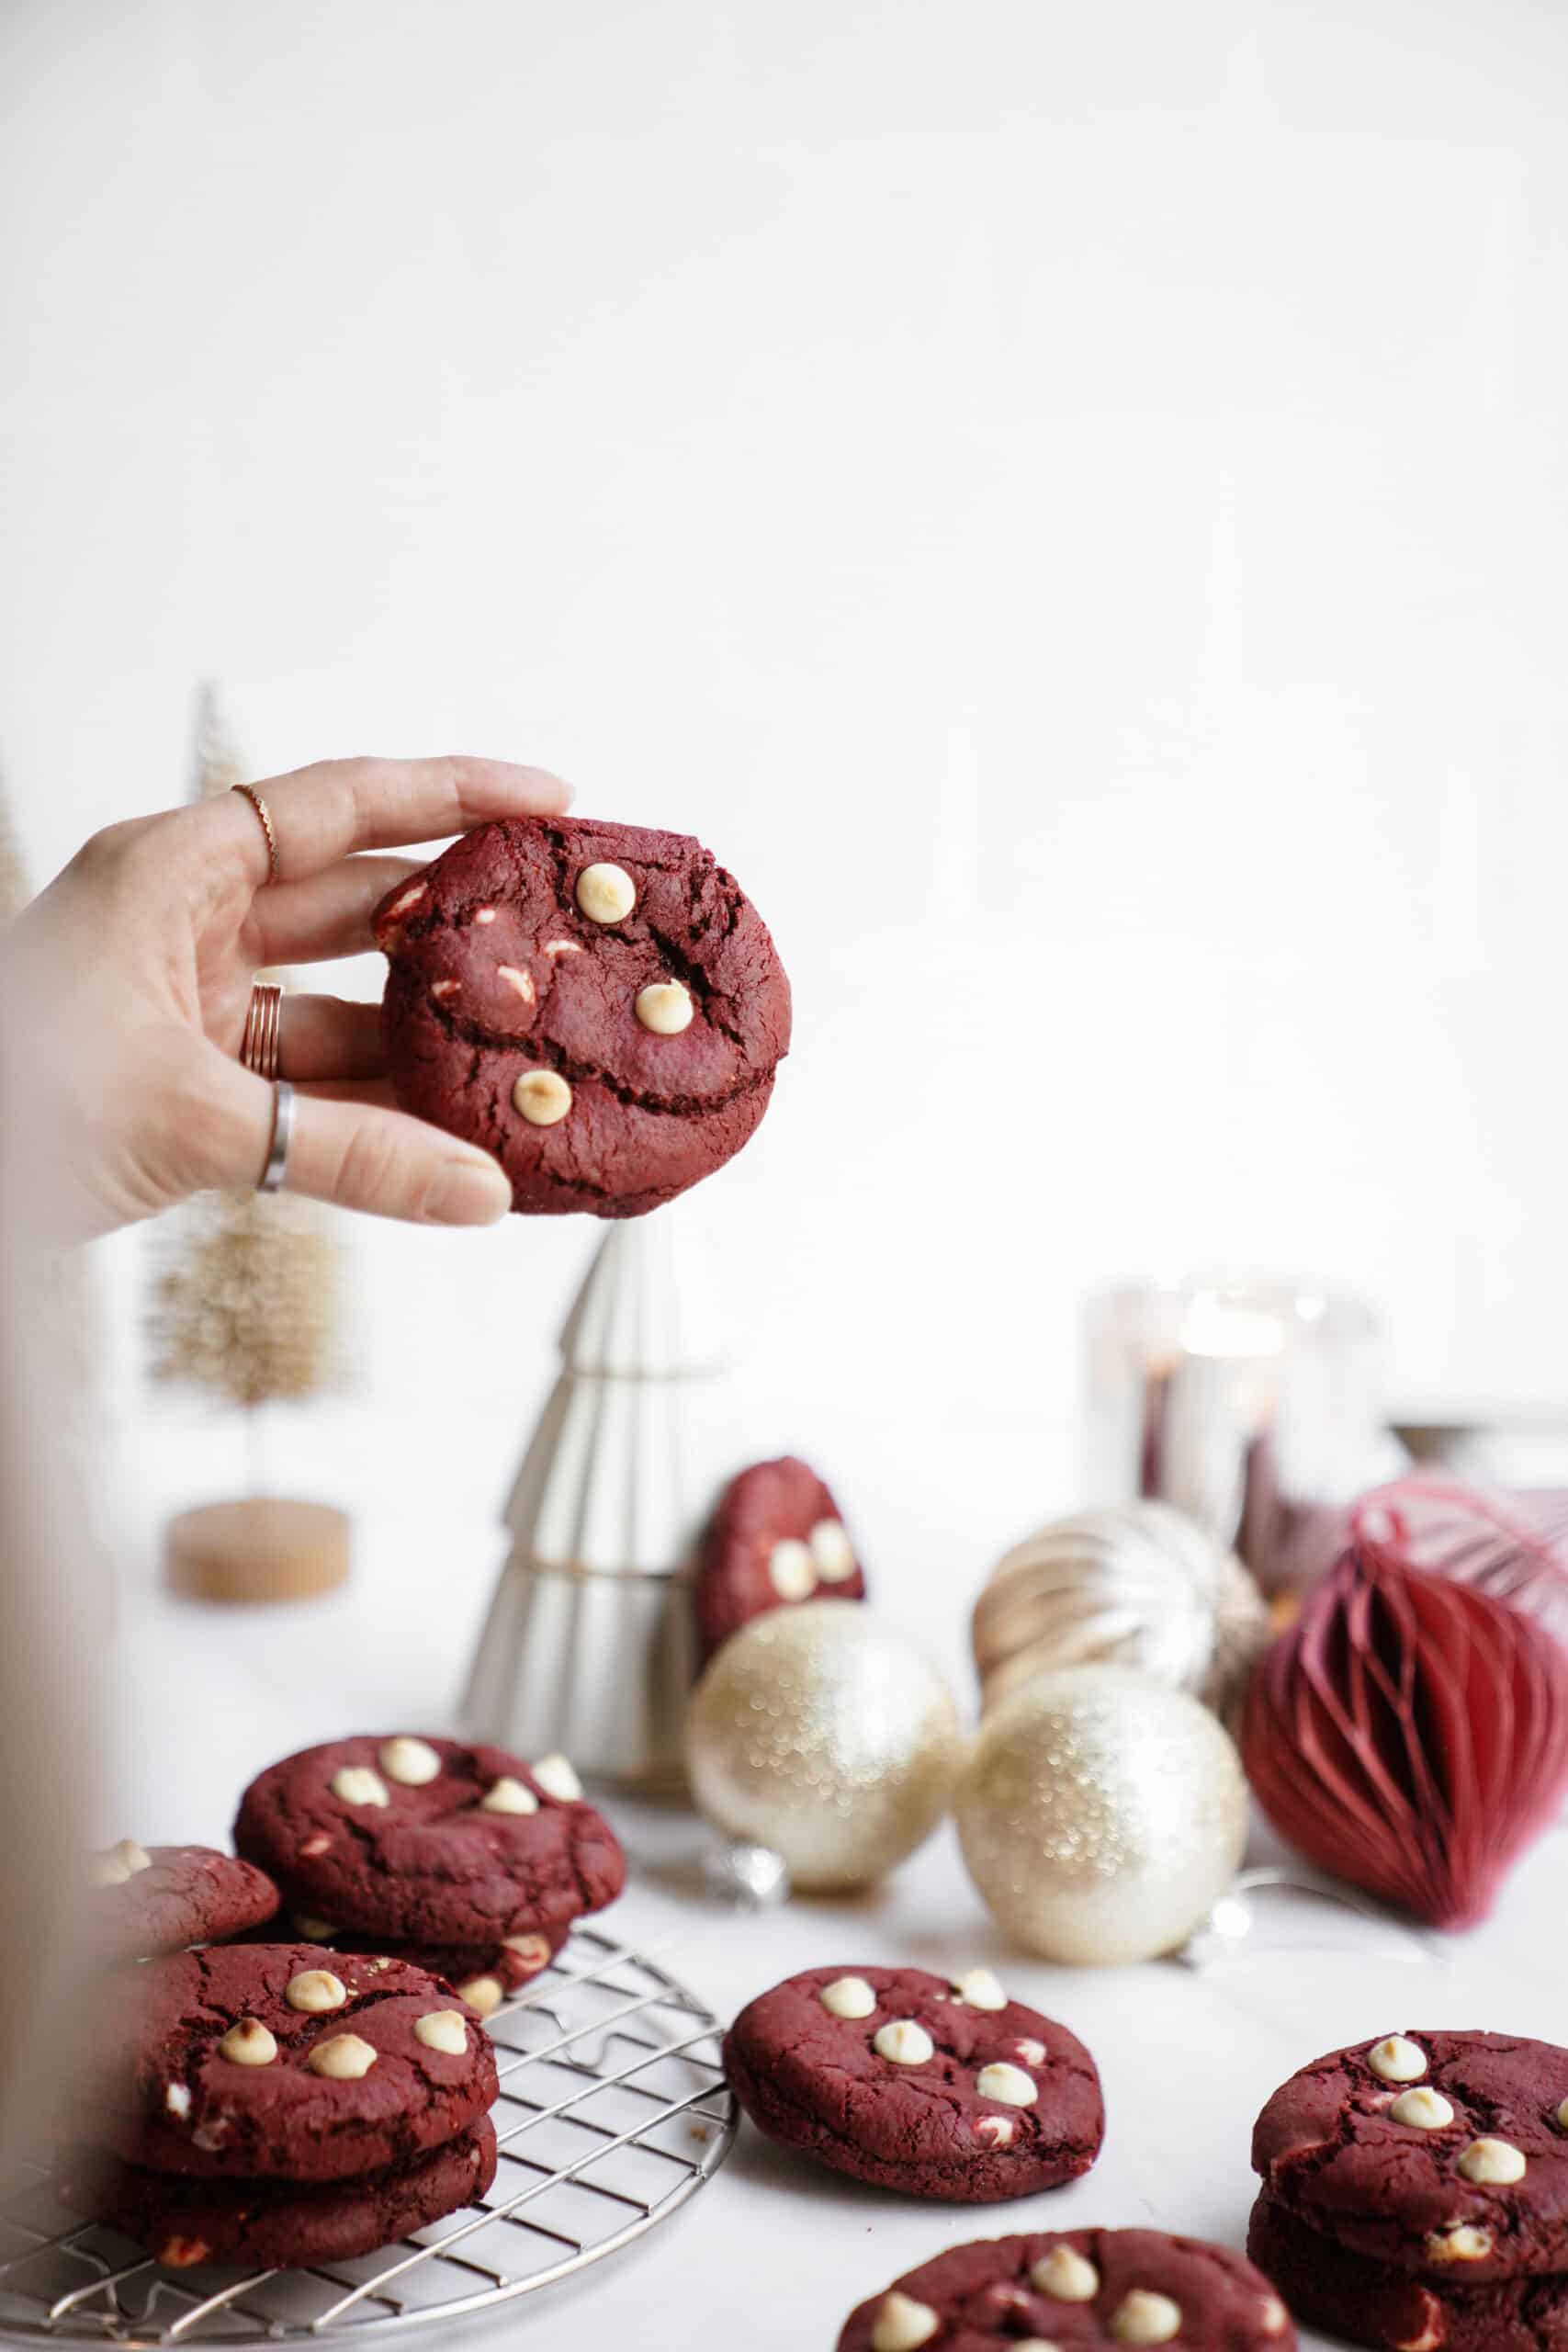
Red Velvet Cookies with Cream Cheese Filling
Prep
30 minutes
Cook
14 minutes
Yield
16 -18
🍪 OMG, red velvet cookies with a SECRET cream cheese center?! These gorgeous cookies are like finding treasure in every bite! Naturally red (no scary dyes here!), fluffy, and absolutely irresistible. Your cookie jar will never be the same! ✨

Watch out, world! We have taken the beloved flavors of red velvet cake with cream cheese icing and turned them into cookies. These red velvet cookies have cream cheese filling and white chocolate chips. They are a delicious cookie to make this holiday season (or anytime).
❤️ Why You’ll Love These Red Velvet Cookies with Cream Cheese Filling
- Unique: Forget red velvet cake, these cookies are a fun spin on a classic recipe.
- Quick: Make these in less than 45 minutes.
- Delicious: The combination of red velvet and cream cheese filling is so delicious that you’ll be reaching for more.

🍲 Ingredients
Freeze-Dried Strawberry Powder – What gives these red velvet cookies that unique red color is not food coloring, but freeze-dried strawberry powder. This can usually be found in specialty stores but if you can’t find it, you can use things like beet powder or organic dyes all of which can be purchased online. We used this instead of red dye 40. Red dye 40 can contain contaminants that are said to be cancer-causing, so I try my best to avoid it! The strawberry powder also adds a subtle fruity note that complements the chocolate beautifully.
Chocolate Chips – I use white chocolate chips here because I love the taste, and they look so nice against the red. However, you can use your favorite chocolate chips, chunks, or even a crushed candy bar here. The white chocolate adds sweetness and creates a beautiful visual contrast against the deep red cookie dough.

👩🍳 How to Make Red Velvet Cookies with Cream Cheese Filling
- In a medium-sized bowl, combine flour, cocoa powder, baking soda, and salt. Set aside.
- In a large bowl, combine butter, sugar, and brown sugar, and using a stand or hand mixer, beat for 2 -3 minutes until light and fluffy. Slowly mix in the egg, vanilla, and milk, and beat until combined.
- Add the flour mixture and beat until no streaks or flour clumps remain, creating a smooth and uniform dough. Fold in the white chocolate chips. Cover the bowl in plastic wrap and refrigerate for 1 hour.
- Prepare the cream cheese filling. In a small bowl, using a stand or hand mixer beat the cream cheese until light and airy.
- Add the icing sugar, flour, and vanilla, and whip until fully incorporated and fluffy
- Line a baking tray or small pan with parchment paper and scoop 1 tsp-sized dollop. Use all of the prepared cream cheese fillings. Place in the freezer until cookie assembling.
- Preheat the oven to 350F, and line 2 baking trays with parchment paper.
- Scoop the dough into “ping-pong” size balls, approximately 2 tbsp worth.
- Separate each cookie dough scooped into two and using your hands, press to make round disks. Set aside.
- Remove the cream cheese filling ‘dollops’ out of the freezer and place them on half of the prepared cookie dough disks.
- Place the cookie dough discs (without filling) on top of the cream cheese halves. Seal the edges and gently roll to make a “ping-pong” sized cookie dough ball. Add extra white chocolate chips to the top of the cookie dough balls. Evenly space the cookie dough 3 inches apart onto the baking trays.
- Bake for 14 – 15 minutes, until slightly set on the edges.
- Allow to cool on the baking trays for 2 minutes, then transfer to a wire rack.
🪄 Tips and Tricks
- Chilling is Key: Don’t skip chilling the dough – it prevents spreading and makes the cookies easier to handle when assembling.
- Freezing Filling: Freezing the cream cheese filling prevents it from leaking out during baking and makes assembly much easier.
- Sealing Technique: Press the edges firmly to seal, then gently roll to smooth any seams and prevent filling from escaping.
- Even Spacing: Give cookies plenty of room on the baking sheet – they’ll spread as they bake.
🗒 Substitutions
- Gluten-Free: To make this gluten-free, swap the all-purpose flour for 1½ cups of Bob’s Red Mill 1:1 Gluten-Free Flour Blend.
- Coloring: Omit all of the red food colorings and use just freeze-dried strawberry powder OR vice versa! Use any of your favorite colors for your cookies.
- Chocolate Chips: For different flavor profiles, try dark chocolate chips, mini chocolate chips, or even chopped pecans.
- Natural Alternatives: Beet powder also creates a beautiful red color, though it has a more earthy flavor than strawberry powder.
🗒 Best served with
- No Churn Vanilla Ice Cream with Pink Salt + Olive Oil
- Easy Fresh Fruit Salad
- No-Churn Pistachio Ice Cream
- Barista Blend Oat Milk

👝 How to Store Leftovers
Store cookies at room temperature in an airtight container for 3-4 days or in the freezer for 2-3 months. Allow to come to room temperature or warm in the microwave slightly to serve. The cream cheese filling may firm up when cold, so letting it come to room temperature gives the best texture.
🤔 Common Questions
Some people use dye to create that red color but red velvet can also be made with cocoa powder, vinegar, and buttermilk. The combination of these ingredients creates a chemical reaction that helps give it that deep maroon color. However, usually, this is then enhanced with some sort of dye.
Yes! The cookie dough can be made up to 2 days ahead and stored in the refrigerator. You can even assemble the filled cookies and freeze them unbaked for up to 1 month – just add an extra minute or two to the baking time.
Freezing the filling makes it much easier to handle during assembly and prevents it from melting and leaking out during baking. It acts like a solid center that stays put.
The filling recipe is specifically designed to hold up during baking. Regular frosting would be too soft and would likely leak out. Stick to the recipe for best results.
The edges should be set but the centers may still look slightly soft. They’ll continue cooking on the hot pan after removal from the oven. Overbaking will make them dry.
Add a small amount of natural red food coloring along with the strawberry powder. Start with just a few drops and add more until you reach your desired color intensity.

Red Velvet Cookies with Cream Cheese Filling
Ingredients
- ½ cup butter softened
- ¾ cup sugar
- ½ cup brown sugar
- 1 egg room temperature
- 2 tbsp milk or plant-based milk
- 1 tbsp vanilla
- 2 cups all-purpose flour
- ⅓ cup cocoa powder
- 1 tsp baking soda
- ¼ tsp salt
- 2 ½ tbsp freeze-dried strawberry powder
- 1 tsp red food colouring
- ½ cup white chocolate chips
- For the Cream Cheese Filling
- ¼ + 2 tbsp cream cheese
- 1 cup + 2 tbsp icing sugar
- 2 tsp all-purpose flour
- 1 tsp vanilla
Instructions
- In a medium-sized bowl, combine flour, cocoa powder, baking soda, and salt. Set aside.
- In a large bowl, combine butter, sugar, and brown sugar, and using a stand or hand mixer, beat for 2 -3 minutes until light and fluffy. Slowly mix in the egg, vanilla, and milk, and beat until combined.
- Add the flour mixture and beat until no streaks or flour clumps remain, creating a smooth and uniform dough. Fold in the white chocolate chips. Cover the bowl in plastic wrap and refrigerate for 1 hour.
- Prepare the cream cheese filling. In a small bowl, using a stand or hand mixer, beat the cream cheese until light and airy.
- Add the icing sugar, flour, and vanilla, and whip until fully incorporated and fluffy
- Line a baking tray or small pan with parchment paper and scoop 1 tsp-sized dollop. Use all of the prepared cream cheese fillings. Place in the freezer until cookie assembling.
- Preheat the oven to 350F, and line 2 baking trays with parchment paper.
- Scoop the dough into “ping-pong” size balls, approximately 2 tbsp worth.
- Separate each cookie dough scooped into two and using your hands, press to make round disks. Set aside.
- Remove the cream cheese filling ‘dollops’ out of the freezer and place them on half of the prepared cookie dough disks.
- Place the cookie dough discs (without filling) on top of the cream cheese halves. Seal the edges and gently roll to make a “ping-pong” sized cookie dough ball. Add extra white chocolate chips to the top of the cookie dough balls. Evenly space the cookie dough 3 inches apart onto the baking trays.
- Bake for 14 – 15 minutes, until slightly set on the edges.
- Allow to cool on the baking trays for 2 minutes, then transfer to a wire rack.
Enjoy!!
Notes
Nutrition


Family loved this!