Stuffed
Fluffy Greek Pita Bread Recipe
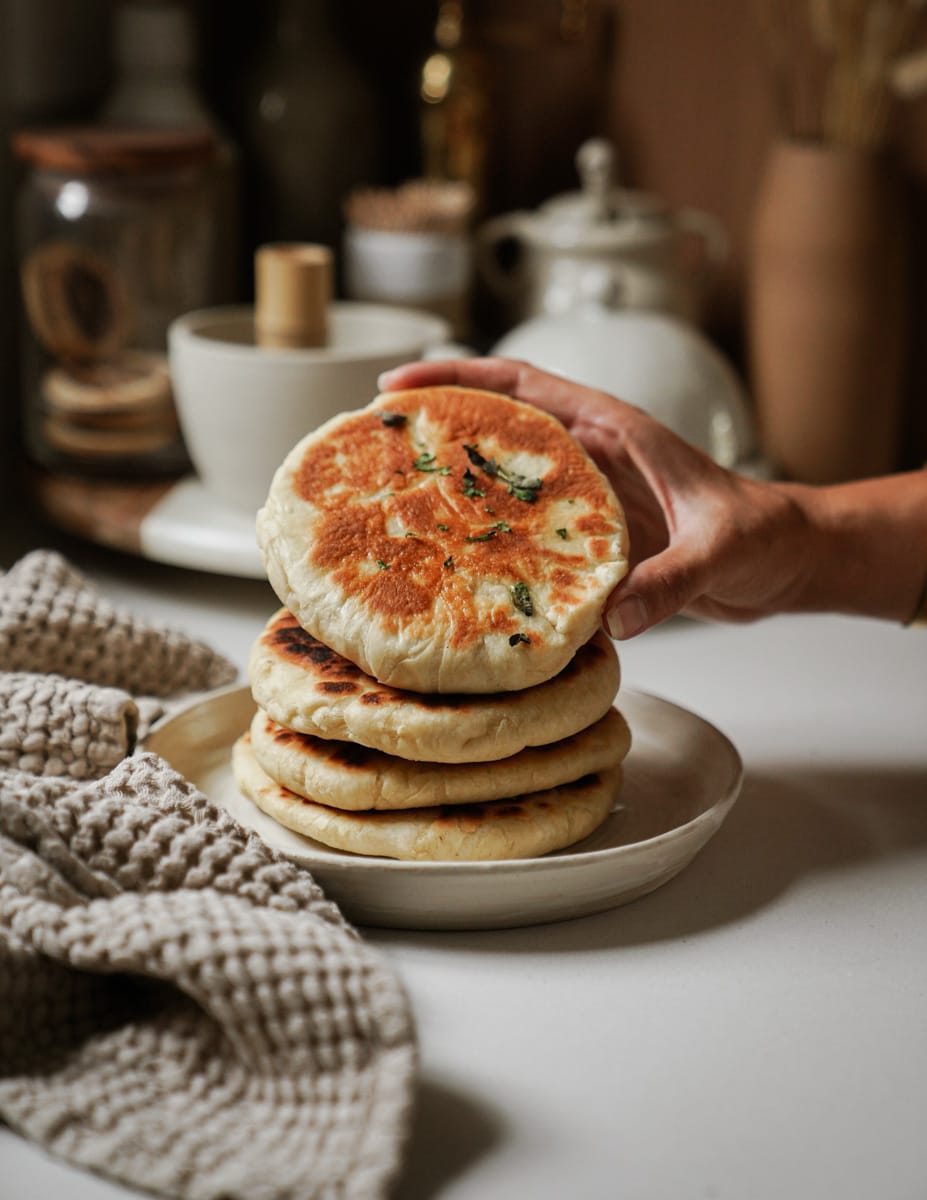
Prep
10 minutes
Cook
35 minutes
Yield
6 pitas
With my Fluffy Greek Pita Bread, you will never need to buy pita again! It’s so fluffy and so easy to make. The best part? Use this Greek Pita bread recipe to scoop, dip, or wrap – whatever you’re craving!
With my Fluffy Greek Pita Bread, you will never need to buy pita again! It’s so fluffy and so easy to make. The best part? Use this Greek Pita bread recipe to scoop, dip, or wrap – whatever you’re craving! I also have included in this blog post a variety of delicious variations to this pita recipe to give you a one-stop-shop of all things pita.
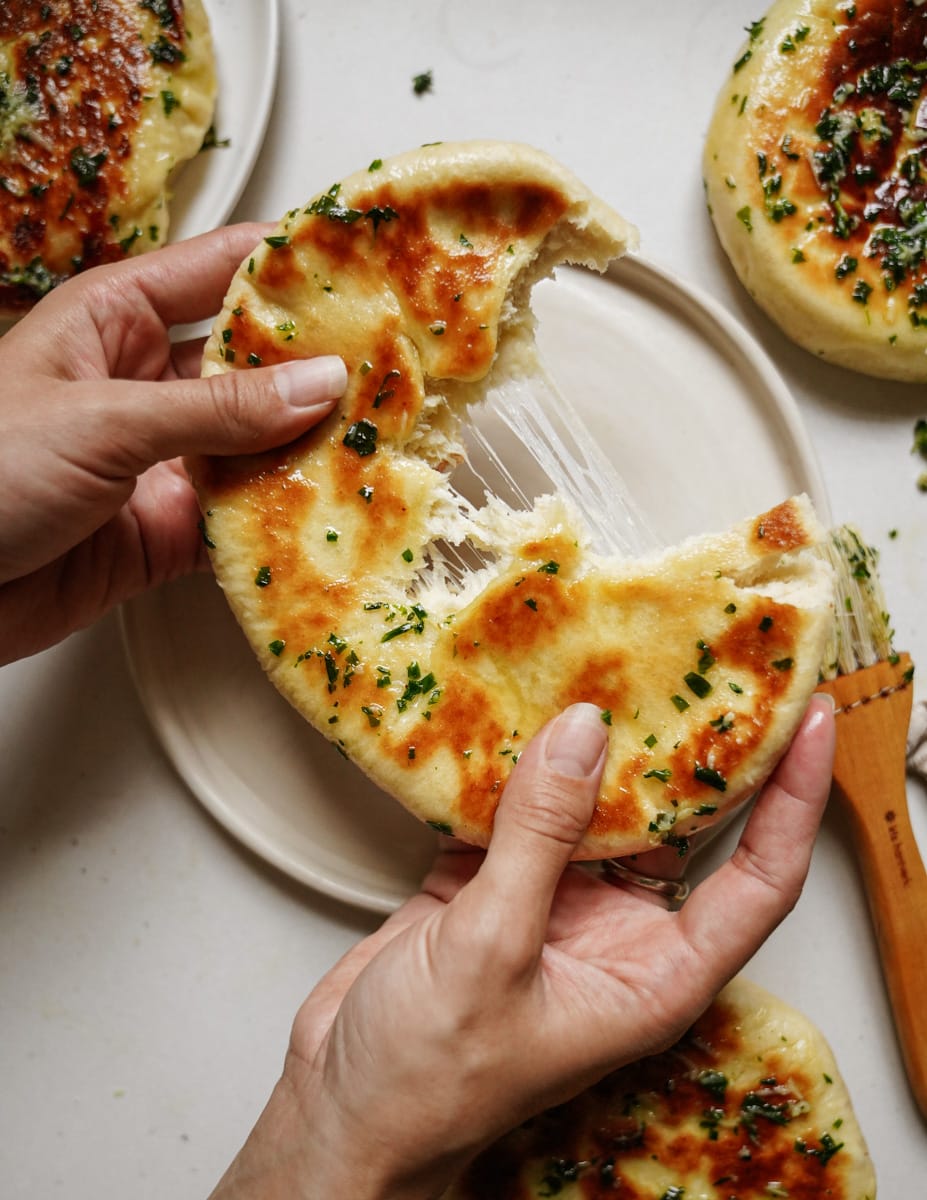
❤️ 🫓 Why You’ll Love This Fluffy Greek Pita Bread
- Fluffy: These pitas are so fluffy when made fresh – you will not want to have pita any other way
- Perfect Match: My Greek pitas are the perfect side to all of my favorite Greek dips
- Easy: All you need is seven ingredients – ones that you probably already have in your pantry
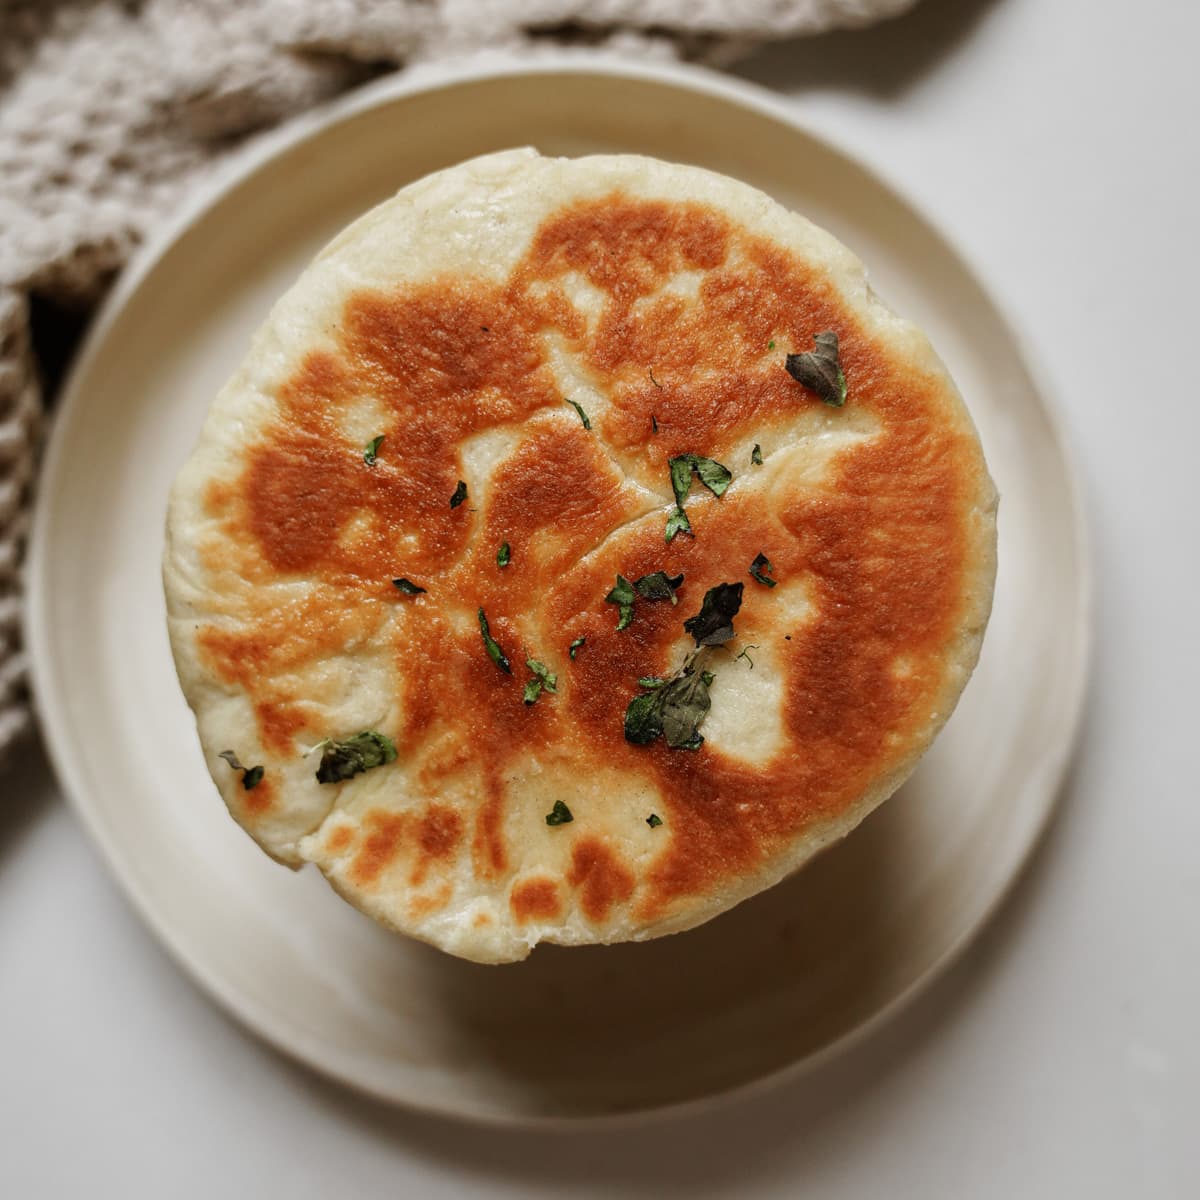
🍲 Ingredients
Olive Oil: When it comes to olive oil, you pour with your heart because it’s good for your heart. That’s right – olive oil is loaded with heart-healthy fats and antioxidants.
Whole Milk: Loaded with important vitamins and nutrients such as calcium and Vitamins A and D, whole milk is also packed with protein.
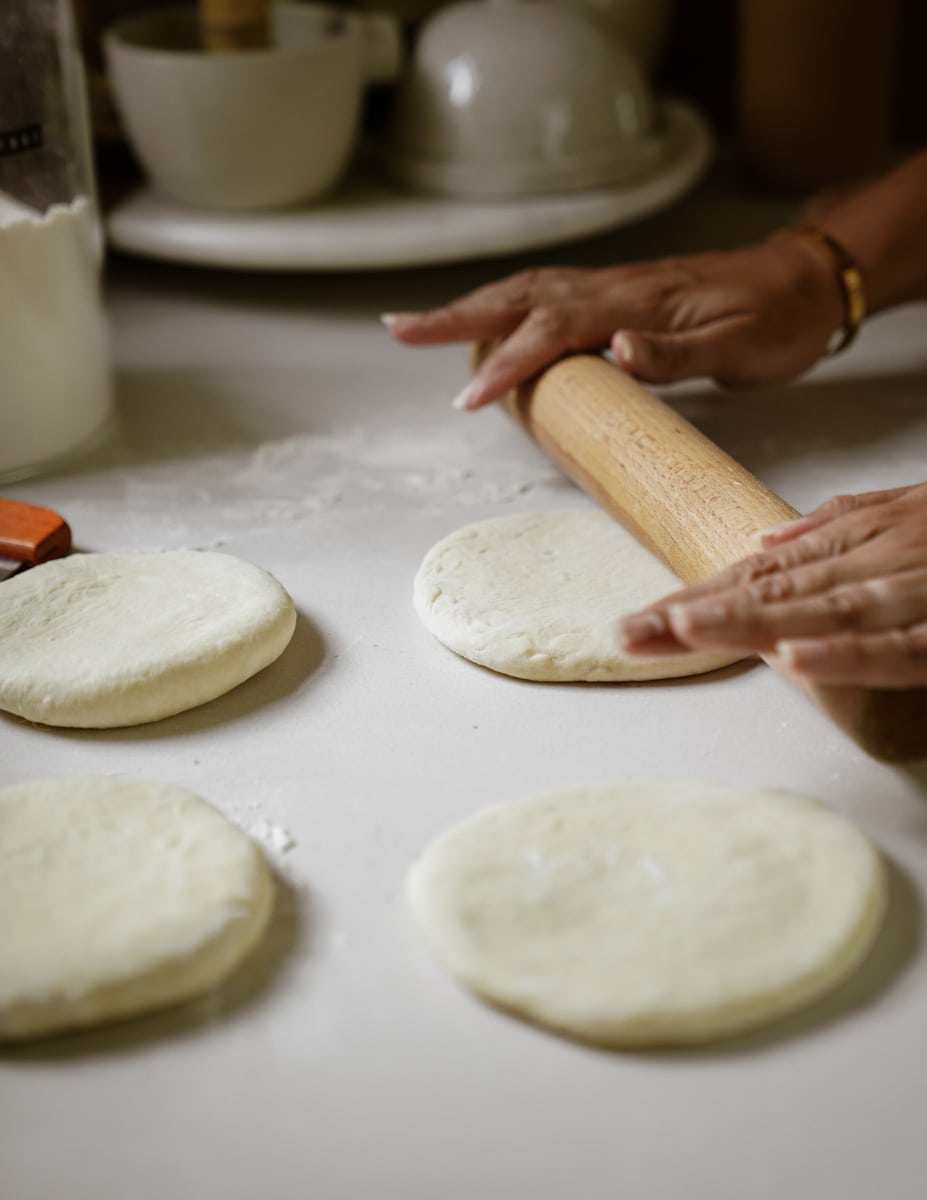
👩🍳 How to Make Fluffy Greek Pita Bread
- To a medium bowl, add warm water and milk (temperature should be very warm to the touch but not too hot that you can’t hold a finger in the water for a few seconds).
- Whisk in the sugar first and then the yeast. Let sit for 5 minutes until it becomes frothy.
- Whisk in the olive oil and salt.
- Use a wooden spoon to stir in the flour and mix until a shaggy dough forms. Transfer the dough to a floured surface and knead for 10 minutes until the dough becomes more smooth and elastic.
- Put the dough back into the mixing bowl and cover with plastic wrap. Place in a warm spot to rise until doubled in size, about 1 1/2 hours.
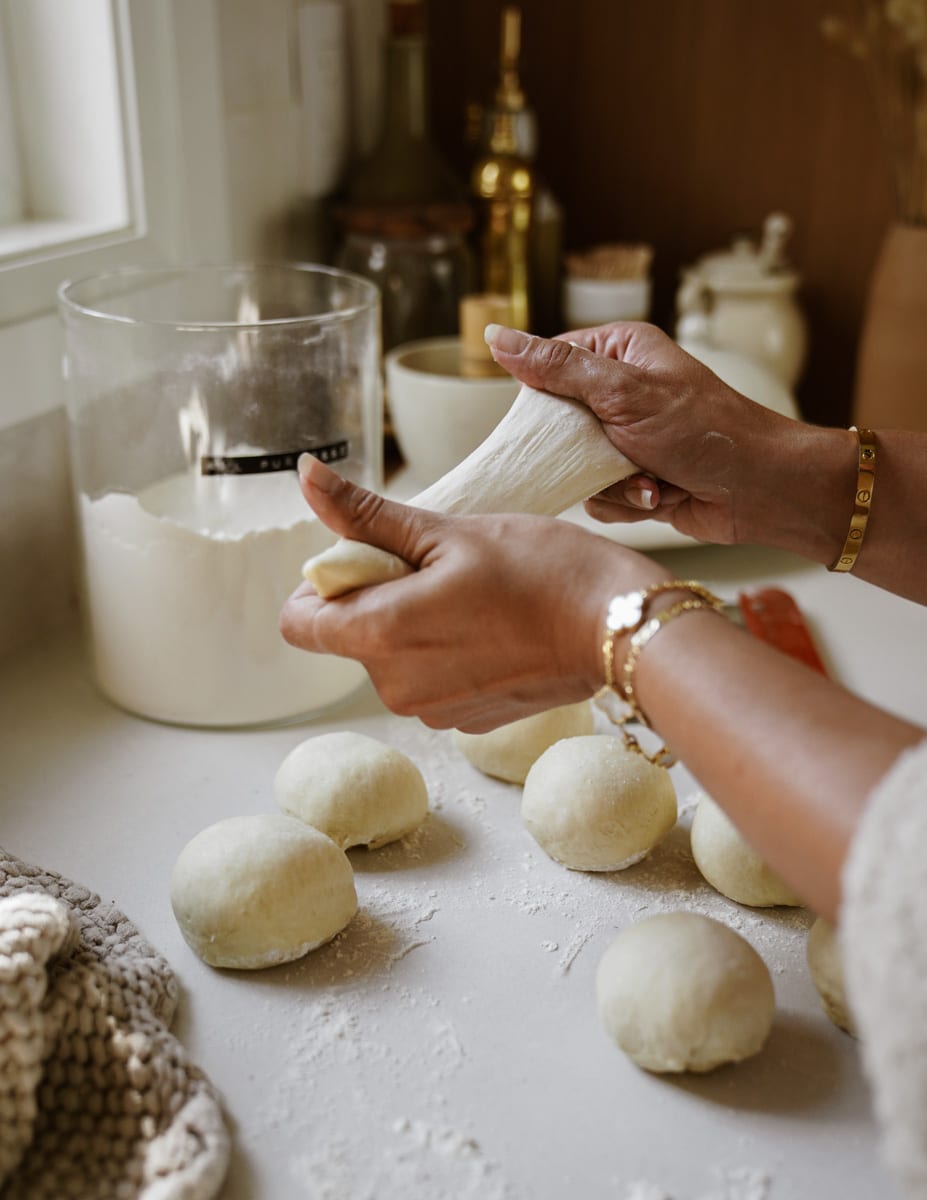
- After the first rise, put the dough back onto a floured work surface and form the dough into a circle so you can divide it into 6 equal pieces. The dough might be sticky so feel free to wet your hands with water and dust the dough with flour if needed.
- Form the 6 pieces of dough into circles and place them on a parchment-lined baking sheet. Let rest covered with a tea towel for 1 more hour.
- After the second rise, roll each dough circle into 5-inch wide circles.
- Heat a cast iron or heavy-bottomed non-stick skillet over high heat and once hot (this may take 3-4 minutes) turn to medium heat. Place a rolled-out dough round in the pan. Cook for 30 seconds and flip. Cook for 30 more seconds. Then, drizzle about 1 tbsp of olive oil on the pita (both sides). Cook for 5 more minutes, flipping every minute for a total of 6 minutes. The pita should be a deep golden brown and puffed up. Repeat the cooking process until all 6 pitas are cooked. Enjoy topped with fresh oregano and our best-ever tzatziki recipe!
🗒 Variations
There are so many different variations you can do with this Fluffy Greek Pita Bread. Here are some of my favs:
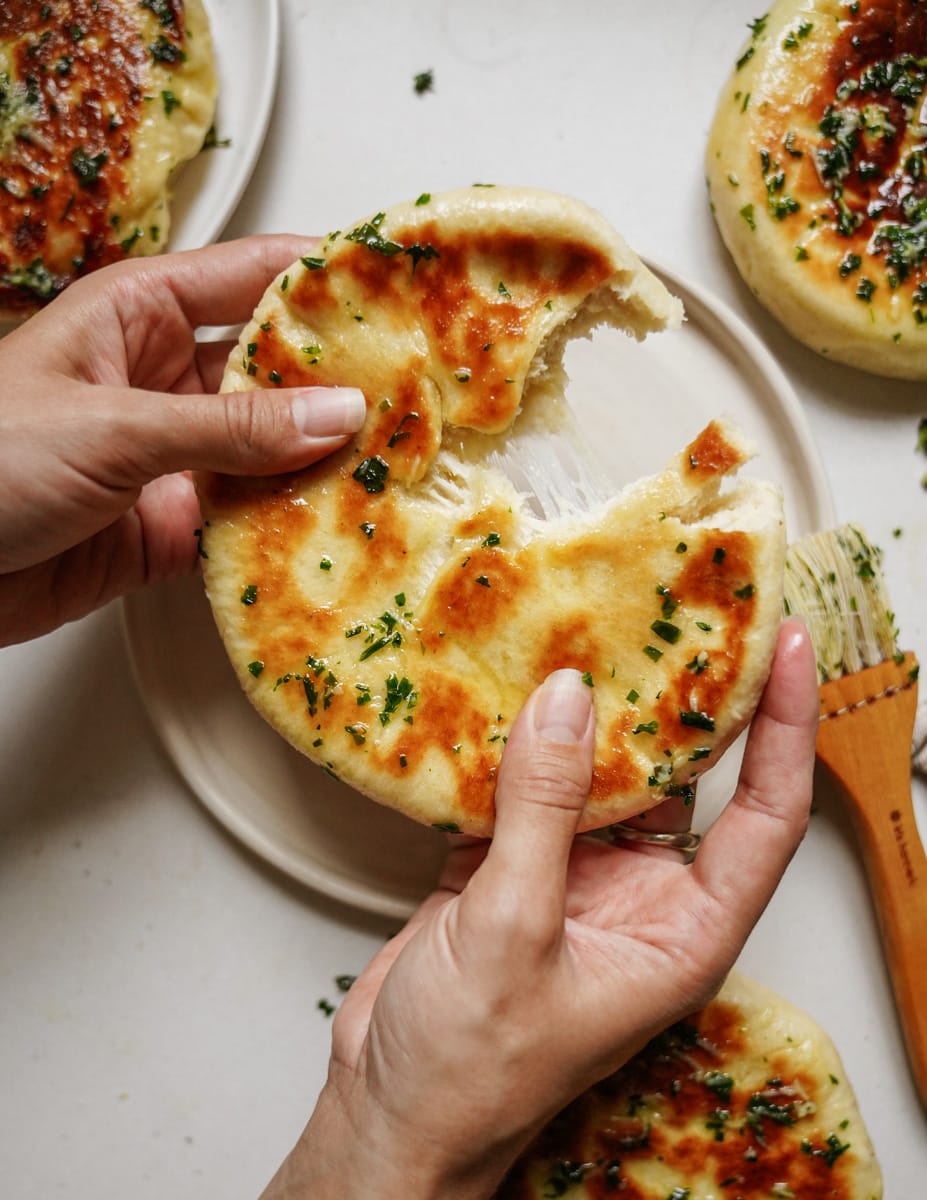
Cheese-Stuffed Fluffy Greek Pita Bread
- 2 cups shredded mozzarella cheese
- 2/3 cup crumbled feta cheese
- 2 tsp garlic powder
- Mix together the shredded mozzarella cheese, crumbled feta cheese, and garlic powder. Use a fork to sort of mash it together. Set aside.
- To make these pitas cheese-stuffed, follow the instructions up until after the first rise (step 6). After the first rise, put the dough back onto a floured work surface and form the dough into a circle so you can divide it into 6 equal pieces. The dough might be sticky so feel free to wet your hands with water and dust the dough with flour if needed.
- Once divided into 6 equal pieces, use your hands to flatten each of the 6 pieces of dough. Divide the cheese mixture between the 6 pieces of pita dough. Use your hands to sort of pinch the dough up and in towards the centre, to seal the cheese inside the dough and form a ball. Place the dough balls on a parchment-lined baking sheet and let rest covered with a tea towel for 1 more hour.
- After the second rise, roll each dough circle into 5-inch wide circles.
- Heat a cast iron or heavy-bottomed non-stick skillet over high heat and once hot (this may take 3-4 minutes) turn to medium heat. Place a rolled-out dough round in the pan. Cook for 30 seconds and flip. Cook for 30 more seconds. Then, drizzle about 1 tbsp of olive oil on the pita (both sides). Cook for 5 more minutes, flipping every minute for a total of 6 minutes. The pita should be a deep golden brown and puffed up. Repeat the cooking process until all 6 pitas are cooked. Enjoy topped with fresh oregano and our Tzatziki Recipe! Alternatively, enjoy our herb garlic butter recipe below.
Herb Garlic Butter
- 1/3 cup unsalted butter
- 2 garlic cloves, pressed
- 1/2 cup mixed chopped fresh herbs (parsley, chives & oregano)
- Once the original fluffy pitas or cheese-stuffed pitas are cooked, make the herb butter. To a pan add the butter and melt over medium-low heat. Once melted add the garlic and fresh herbs. Cook for a few minutes to combine the flavors and then remove from the heat. Use the herb garlic butter to brush on the freshly cooked pitas and serve.
Apple Cinnamon Cream Cheese Stuffed Pita Bread
- 1 tbsp unsalted butter
- 1 cup grated Cosmic Crisp apples
- 2 tbsp brown sugar
- 1 tsp cinnamon
- 1/4 tsp salt
- 1 cup softened cream cheese
- 2 tbsp butter
- 2 tbsp maple syrup
- Drain any juice that’s released from the shredded apple. Heat 1 tbsp butter in a frying pan over medium heat. Once the butter is melted add the grated apple, brown sugar, cinnamon and salt. Stir and cook for 4-5 minutes until combined and the shredded apple has softened. Set aside in a bowl to cool.
- Once the apple mixture is fully cooled, mix with the cream cheese. Use a fork to sort of mash it together. Set aside.
- To make these pita’s apple cinnamon cream cheese-stuffed, follow the instructions up until after the first rise (step 6). After the first rise, put the dough back onto a floured work surface and form the dough into a circle so you can divide it into 6 equal pieces. The dough might be sticky so feel free to wet your hands with water and dust the dough with flour if needed.
- Once divided into 6 equal pieces, use your hands to flatten each of the 6 pieces of dough. Divide the apple cream cheese mixture between the 6 pieces of pita dough. Use your hands to sort of pinch the dough up and in towards the centre, to seal the apple mixture inside the dough and form a ball. Place the dough balls on a parchment-lined baking sheet and let rest covered with a tea towel for 1 more hour.
- After the second rise, gently roll each dough circle into 5-inch wide circles.
- Heat a cast iron or heavy-bottomed non-stick skillet over high heat and once hot (this may take 3-4 minutes) turn to medium heat. Place a rolled-out dough round in the pan. Cook for 30 seconds and flip. Cook for 30 more seconds. Cook for 5 more minutes, flipping every minute for a total of 6 minutes. The pita should be a deep golden brown and puffed up. Repeat the cooking process until all 6 pitas are cooked. Enjoy as-is or top with our maple syrup butter (melt 2 tbsp butter and 2 tbsp maple syrup together until warmed through).
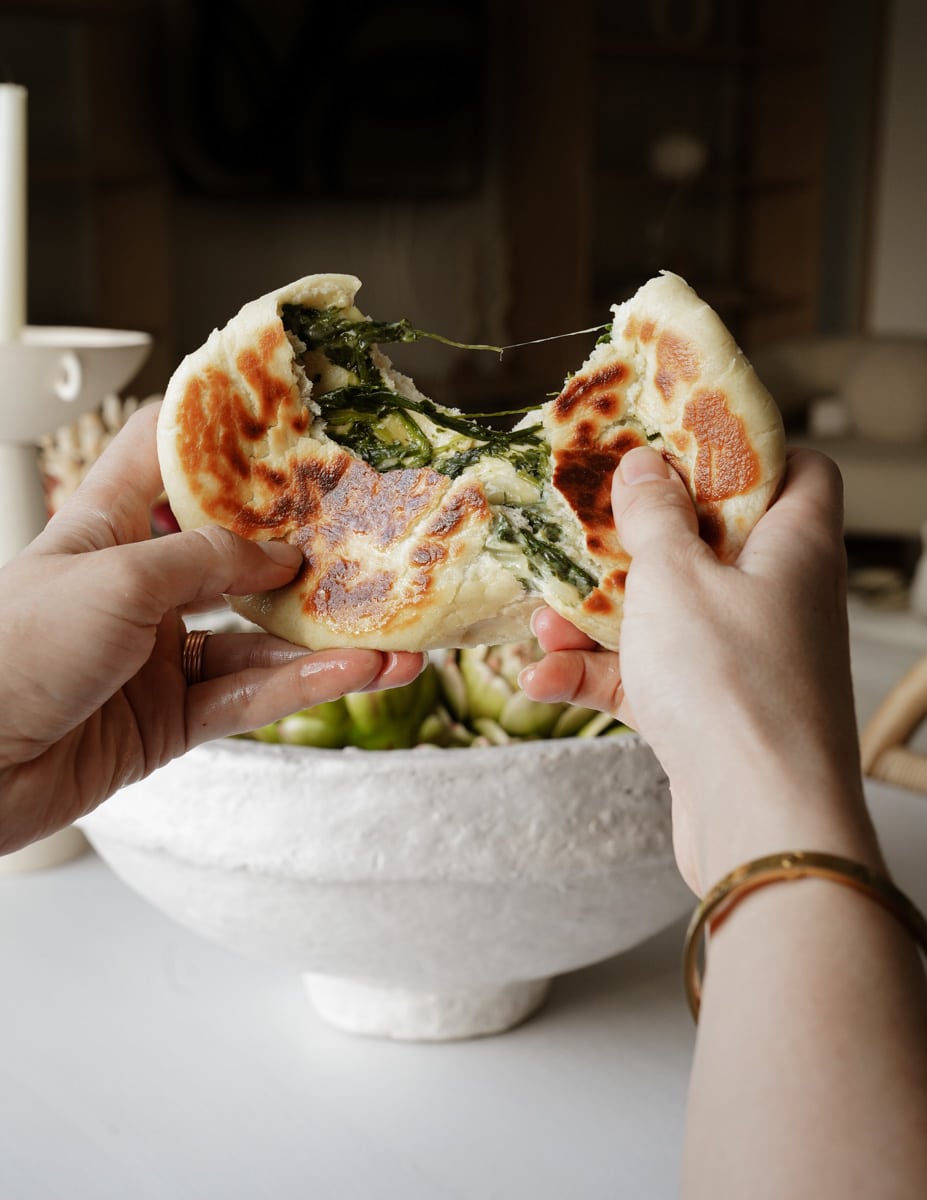
Spanakopita Stuffed Pita Bread
- 1 tbsp olive oil
- 1/2 medium white onion, finely chopped
- 3/4 cup finely chopped green onion
- 1/2 cup chopped fresh dill
- 1/2 cup chopped fresh parsley
- 1/4 cup chopped fresh mint
- 1 tbsp vegetable stock paste
- 450 g fresh spinach
- 1/3 cup crumbled feta cheese
- 1 1/2 cups shredded mozzarella cheese
- While the pita dough is on its first rise, make the spanakopita filling. In a large pot, heat your olive oil on medium heat for around 30 seconds.
- Add the onions and saute until softened about 4-5 minutes. Stir often to avoid burning.
- Once the onions have softened, add the green onions, dill, parsley, mint, and vegetable stock paste. Cook for around 2 minutes or until wilted considerably.
- Next, add the spinach, and stir until wilted- you want to cook this down until there is no moisture left.
- Once the spinach is ready, stir in the feta, and remove from heat to cool in a bowl or container in the fridge. Once cooled REMOVE 1/3 CUP OF THE SPINACH MIXTURE (enjoy at another time!)Then, stir in the shredded mozzarella cheese into the spanakopita mixture and set aside.
- To make these pita spanakopita-stuffed, follow the instructions up until after the first rise (step 6). After the first rise, put the dough back onto a floured work surface and form the dough into a circle so you can divide it into 6 equal pieces. The dough might be sticky so feel free to wet your hands with water and dust the dough with flour if needed.
- Once divided into 6 equal pieces, use your hands to flatten each of the 6 pieces of dough. Divide the spanakopita cheese mixture between the 6 pieces of pita dough. Use your hands to sort of pinch the dough up and in towards the centre, to seal the spanakopita-cheese mixture inside the dough and form a ball. Place the dough balls on a parchment-lined baking sheet and let rest covered with a tea towel for 1 more hour.
- After the second rise, gently roll each dough circle into 5-inch wide circles.
- Heat a cast iron or heavy-bottomed non-stick skillet over high heat and once hot (this may take 3-4 minutes) turn to medium heat. Place a rolled-out dough round in the pan. Cook for 30 seconds and flip. Cook for 30 more seconds. Then, drizzle about 1 tbsp of olive oil on the pita (both sides). Cook for 5 more minutes, flipping every minute for a total of 6 minutes. The pita should be a deep golden brown and puffed up. Repeat the cooking process until all 6 pitas are cooked. Enjoy as-is or with our Best Ever Tzatziki Recipe!
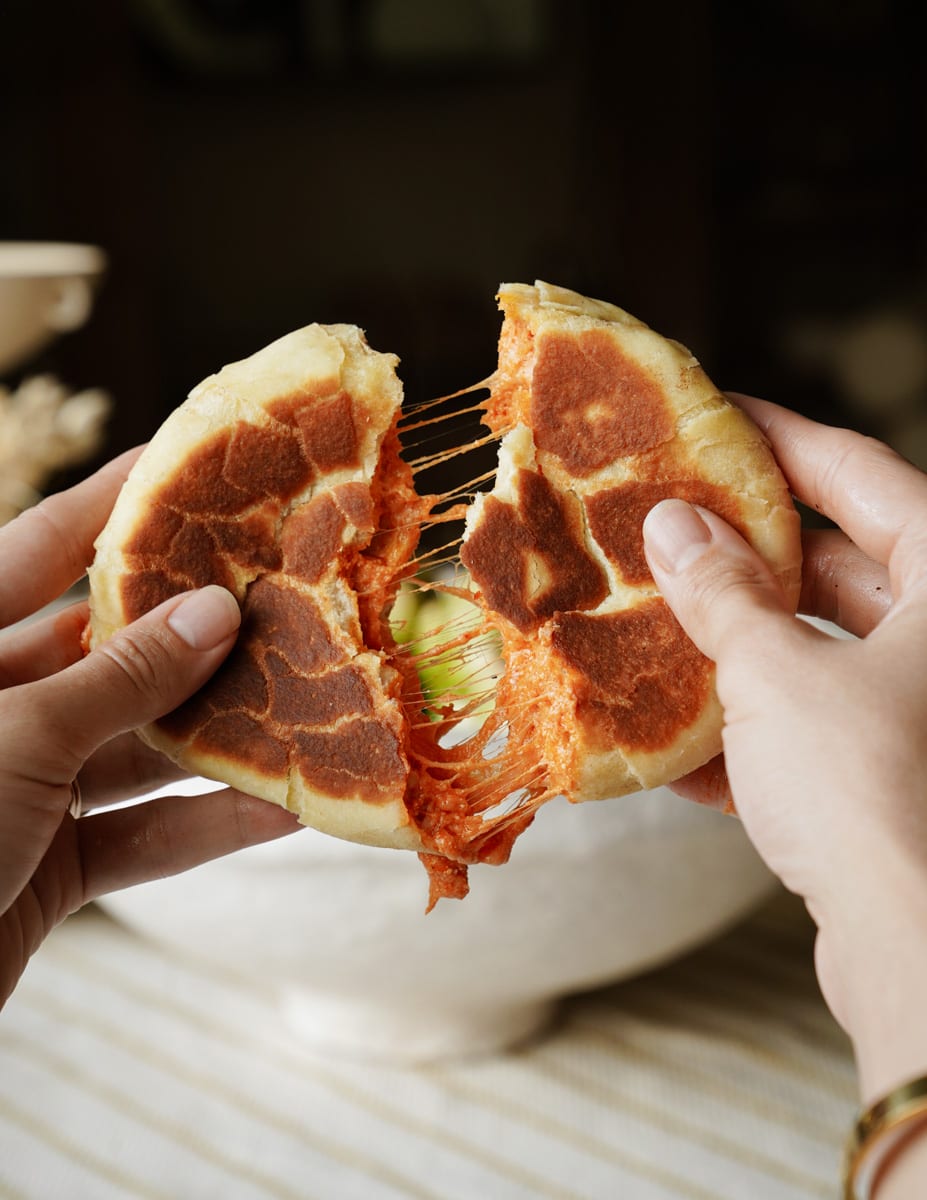
Spicy Greek Feta Dip (Tirokafteri) & Cheese-Stuffed Pita Bread
- 2 1/3 cups shredded mozzarella cheese
- 1/3 cup Spicy Greek Feta Dip (Tirokafteri) (use our spicy feta dip recipe)
- Mix together the shredded mozzarella cheese and the spicy feta dip. Use a fork to sort of mash it together. Set aside.
- To make these pita cheese-stuffed, follow the instructions up until after the first rise (step 6). After the first rise, put the dough back onto a floured work surface and form the dough into a circle so you can divide it into 6 equal pieces. The dough might be sticky so feel free to wet your hands with water and dust the dough with flour if needed.
- Once divided into 6 equal pieces, use your hands to flatten each of the 6 pieces of dough. Divide the spicy Greek feta dip-cheese mixture between the 6 pieces of pita dough. Use your hands to sort of pinch the dough up and in towards the centre, to seal the cheese inside the dough and form a ball. Place the dough balls on a parchment-lined baking sheet and let rest covered with a tea towel for 1 more hour.
- After the second rise, roll each dough circle into 5-inch wide circles.
- Heat a cast iron or heavy-bottomed non-stick skillet over high heat and once hot (this may take 3-4 minutes) turn to medium heat. Place a rolled-out dough round in the pan. Cook for 30 seconds and flip. Cook for 30 more seconds. Then, drizzle about 1 tbsp of olive oil on the pita (both sides). Cook for 5 more minutes, flipping every minute for a total of 6 minutes. The pita should be a deep golden brown and puffed up. Repeat the cooking process until all 6 pitas are cooked. Enjoy topped with fresh oregano and our Best Ever Tzatziki Recipe! Alternatively, enjoy our herb garlic butter recipe above
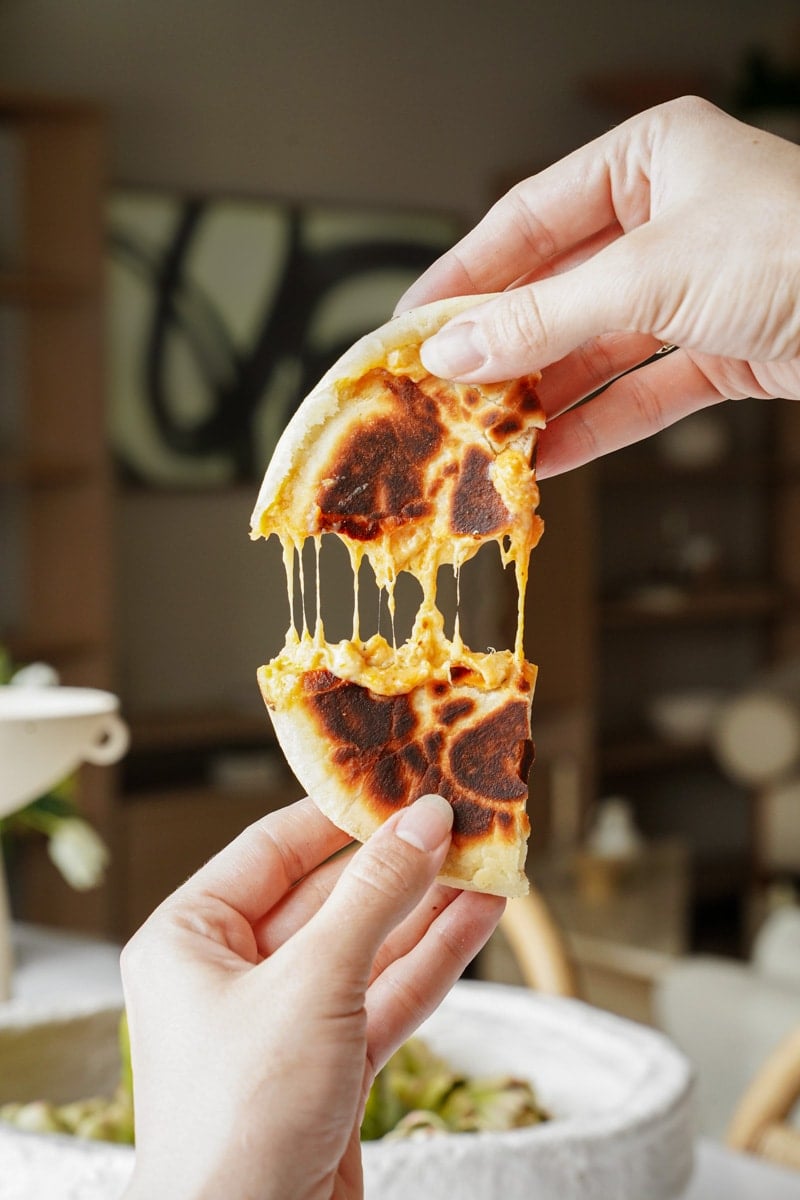
Buffalo Chicken Stuffed Pita Bread
- 1 2/3 cup shredded mozzarella cheese
- 2/3 cup shredded cheddar cheese
- 1/2 tsp dried oregano
- 3/4 tsp garlic powder
- 2/3 cup shredded cooked chicken
- 2 tbsp buffalo hot sauce
- 1 tbsp roasted red pepper hot sauce (if you don’t have this hot sauce just use one more tablespoon of buffalo hot sauce)
- ranch dip or dressing for serving (use our ranch dip recipe if desired)
- Mix together the shredded cheeses, dried oregano, garlic powder, shredded cooked chicken, and hot sauces until combined. Set aside in the fridge.
- To make these pita buffalo chicken stuffed, follow the instructions up until after the first rise (step 6). After the first rise, put the dough back onto a floured work surface and form the dough into a circle so you can divide it into 6 equal pieces. The dough might be sticky so feel free to wet your hands with water and dust the dough with flour if needed.
- Once divided into 6 equal pieces, use your hands to flatten each of the 6 pieces of dough. Divide the buffalo chicken-cheese mixture between the 6 pieces of pita dough. Use your hands to sort of pinch the dough up and in towards the centre, to seal the cheese inside the dough and form a ball. Place the dough balls on a parchment-lined baking sheet and let rest covered with a tea towel for 1 more hour.
- After the second rise, roll each dough circle into 5-inch wide circles.
- Heat a cast iron or heavy-bottomed non-stick skillet over high heat and once hot (this may take 3-4 minutes) turn to medium heat. Place a rolled-out dough round in the pan. Cook for 30 seconds and flip. Cook for 30 more seconds. Then, drizzle about 1 tbsp of olive oil on the pita (both sides). Cook for 5 more minutes, flipping every minute for a total of 6 minutes. The pita should be a deep golden brown and puffed up. Repeat the cooking process until all 6 pitas are cooked. Enjoy dipped into our ranch dip recipe or your favorite ranch dip.
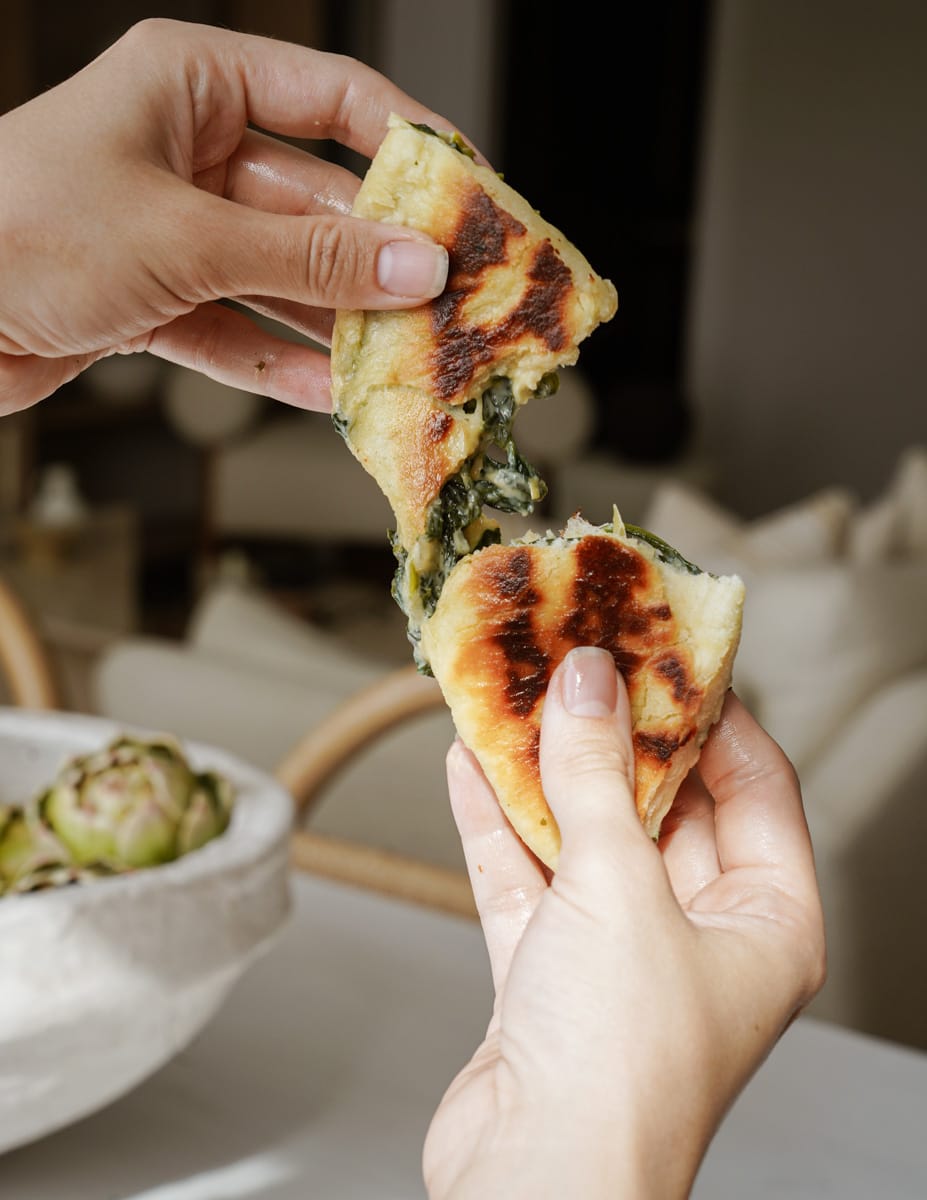
Spinach Artichoke Pita Bread
- 1 tbsp olive oil
- 1/2 medium white onion, finely chopped
- 3/4 cup finely chopped green onion
- 3/4 cup chopped canned artichoke hearts (drain the can, then chop)
- 1 tbsp vegetable stock paste or bouillon cube
- 1 tsp onion powder
- 3 tsp garlic powder
- 1/4 tsp salt
- 450g fresh spinach
- 1/3 cup plain cream cheese
- 1 1/2 cups shredded mozzarella cheese
- While the pita dough is on its first rise, make the spinach artichoke filling. In a large pot, heat your olive oil on medium heat for around 30 seconds.
- Add the onions and saute until softened about 4-5 minutes. Stir often to avoid burning.
- Once the onions have softened, add the green onions, chopped artichoke hearts, vegetable stock paste, onion powder, garlic powder and salt. Cook for around 2 minutes, stirring often.
- Next, add the spinach, and stir until wilted- you want to cook this down until there is no moisture left.
- Once the spinach artichoke mixture is ready, remove from heat to cool in a bowl in the fridge. Once cooled REMOVE 1/2 CUP OF THE SPINACH MIXTURE (enjoy at another time!) Then, stir in the plain cream cheese and shredded mozzarella cheese into the spinach artichoke mixture and set aside in the fridge until ready to use.
- To make these pita spinach artichoke-stuffed, follow the instructions up until after the first rise (step 6). After the first rise, put the dough back onto a floured work surface and form the dough into a circle so you can divide it into 6 equal pieces. The dough might be sticky so feel free to wet your hands with water and dust the dough with flour if needed.
- Once divided into 6 equal pieces, use your hands to flatten each of the 6 pieces of dough. Divide the spinach artichoke cheese mixture between the 6 pieces of pita dough. Use your hands to sort of pinch the dough up and in towards the centre, to seal the spinach artichoke-cheese mixture inside the dough and form a ball. Place the dough balls on a parchment-lined baking sheet and let rest covered with a tea towel for 1 more hour.
- After the second rise, gently roll each dough circle into 5-inch wide circles.
- Heat a cast iron or heavy-bottomed non-stick skillet over high heat and once hot (this may take 3-4 minutes) turn to medium heat. Place a rolled-out dough round in the pan. Cook for 30 seconds and flip. Cook for 30 more seconds. Then, drizzle about 1 tbsp of olive oil on the pita (both sides). Cook for 5 more minutes, flipping every minute for a total of 6 minutes. The pita should be a deep golden brown and puffed up. Repeat the cooking process until all 6 pitas are cooked. Enjoy as-is, with our Herb Garlic Butter (above) or with our Best Ever Tzatziki Recipe!
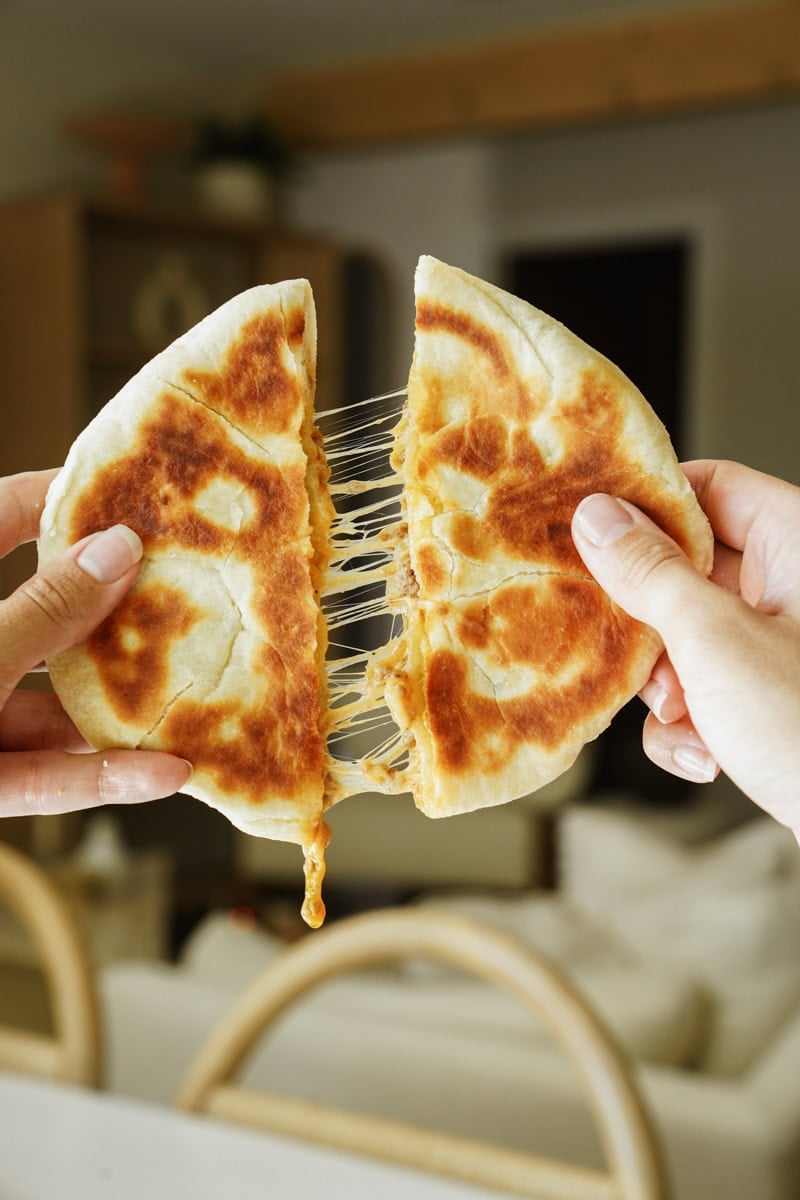
Cheeseburger Stuffed Pita
- 1 2/3 cup shredded mozzarella cheese
- 2/3 cup shredded cheddar cheese
- ¼ cup small diced white onion
- 1 tsp garlic powder
- ½ tsp paprika or smoked paprika
- ½ tsp salt
- ¼ tsp pepper
- ½ tsp chili flakes
- 450g lean ground beef
- Cook the ground beef in a frying pan until cooked through. Once cooked, drain the fat from beef and put 2/3 cup of the cooked beef in a medium mixing bowl. Set the rest of the cooked beef aside; put in the fridge and use for meal prep later!
- Make the burger mixture by adding the diced onion, spices and both shredded cheeses to the ⅔ cup cooked ground beef and mix until combined. Set aside.
- To make these pita cheeseburger-stuffed, follow the instructions up until after the first rise (step 6). After the first rise, put the dough back onto a floured work surface and form the dough into a circle so you can divide it into 6 equal pieces. The dough might be sticky so feel free to wet your hands with water and dust the dough with flour if needed.
- Once divided into 6 equal pieces, use your hands to flatten each of the 6 pieces of dough. Divide the ground beef-cheese mixture between the 6 pieces of pita dough. Use your hands to sort of pinch the dough up and in towards the center, to seal the cheese inside the dough and form a ball. Place the dough balls on a parchment lined baking sheet and let rest covered with a tea towel for 1 more hour.
- After the second rise, roll each dough circle into 5 inch wide circles.
- Heat a cast iron or heavy-bottomed non-stick skillet over high heat and once hot (this may take 3-4 minutes) turn to medium heat. Place a rolled-out dough round in the pan. Cook for 30 seconds and flip. Cook for 30 more seconds. Then, drizzle about 1 tbsp of olive oil on the pita (both sides). Cook for 5 more minutes, flipping every minute for a total of 6 minutes. The pita should be a deep golden brown and puffed up. Repeat the cooking process until all 6 pitas are cooked. Serve with your favourite burger sauce if desired.
Pepperoni Pizza Stuffed Pita Bread
- 2 1/2 cups shredded mozzarella cheese
- 18 slices pepperoni (3 slices per pita)
- 1x small jar pizza sauce
- Optional: season your pizza sauce with extra garlic powder, onion powder or chili flakes
- To make these pitas pizza-stuffed, follow the instructions up until after the first rise (step 6). After the first rise, put the dough back onto a floured work surface and form the dough into a circle so you can divide it into 6 equal pieces. The dough might be sticky so feel free to wet your hands with water and dust the dough with flour if needed.
- Once divided into 6 equal pieces, use your hands to flatten each of the 6 pieces of dough. Spread a dollop of sauce in the middle of each pita dough. Divide the cheese and pepperoni between the 6 pita doughs on top of the sauce. Use your hands to sort of pinch the dough up and in towards the centre, to seal the cheese and sauce inside the dough and form a ball. Place the dough balls on a parchment-lined baking sheet and let rest covered with a tea towel for 1 more hour.
- While the dough is rising, make the hot honey sauce by whisking together the honey, hot sauce and chili flakes.
- After the second rise, roll each dough circle into 5-inch wide circles.
- Heat a cast iron or heavy-bottomed non-stick skillet over high heat and once hot (this may take 3-4 minutes) turn to medium heat. Place a rolled-out dough round in the pan. Cook for 30 seconds and flip. Cook for 30 more seconds. Then, drizzle about 1 tbsp of olive oil on the pita (both sides). Cook for 5 more minutes, flipping every minute for a total of 6 minutes. The pita should be a deep golden brown and puffed up. Repeat the cooking process until all 6 pitas are cooked. Enjoy topped with hot honey drizzle.
🗒 Best served with
- Easy Authentic Tzatziki Recipe
- Spicy Greek Feta Dip (Tirokafteri)
- Whipped Eggplant Dip (Melitzanosalata)
- Comforting Feta Dip (Autumn-Inspired)
👝 How to Store Leftovers
Store cooked and cooled pita bread in an airtight container for a few days on the counter. Or, store fully cooked and cooled pita in the freezer for up to 2 months.
🤔 Common Questions
They’re similar but have their own personalities! Greek pita is thicker, and more versatile (as you can see from the variations above) and it’s most definitely fluffier.
Sometimes you’ll find them referred to as Pide or Khubz.

Fluffy Greek Pita Bread 🫓
Your Greek mommy that is. 😍 Step into my kitchen to learn how to make yummy Greek food. 🍽️💃
Ingredients
- 3 cups bread flour (or all purpose flour)
- 3/4 cup warm water
- 6 tbsp warm whole milk
- 1 1/2 tsp sugar
- 1 1/2 tsp active dry yeast
- 3 tbsp olive oil
- 1 1/2 tsp salt
Instructions
- To a medium bowl add warm water and milk (temperature should be very warm to the touch but not too hot that you can’t hold a finger in the water for a few seconds).
- Whisk in the sugar first and then the yeast. Let sit for 5 minutes until it becomes frothy.
- Whisk in the olive oil and salt.
- Use a wooden spoon to stir in the flour and mix until a shaggy dough forms. Transfer the dough to a floured surface and knead for 10 minutes until the dough becomes more smooth and elastic.
- Put the dough back into the mixing bowl and cover with plastic wrap. Place in a warm spot to rise until doubled in size, about 1 1/2 hours.
- After the first rise, put the dough back onto a floured work surface and form the dough into a circle so you can divide it into 6 equal pieces. The dough might be sticky so feel free to wet your hands with water and dust the dough with flour if needed.
- Form the 6 pieces of dough into circles and place on a parchment lined baking sheet. Let rest covered with a tea towel for 1 more hour.
- After the second rise, roll each dough circle into 5 inch wide circles.
- Heat a cast iron or heavy-bottomed non-stick skillet over high heat and once hot (this may take 3-4 minutes) turn to medium heat. Place a rolled-out dough round in the pan. Cook for 30 seconds and flip. Cook for 30 more seconds. Then, drizzle about 1 tbsp of olive oil on the pita (both sides). Cook for 5 more minutes, flipping every minute for a total of 6 minutes. The pita should be a deep golden brown and puffed up. Repeat the cooking process until all 6 pitas are cooked. Enjoy topped with fresh oregano and our best ever tzatziki recipe!
Video
Notes
- Store cooked and cooled pita bread in an airtight container for a few days on the counter. Or, store fully cooked and cooled pita in the freezer for up to 2 months.
- Enjoy this pita bread with our Greek Chicken Souvlaki or our viral Spicy Whipped Feta

I first I wasn’t sure if this was gonna turn out right because I didn’t really have a warm area to let the bread rise but it was perfect!! would make again and again.
THANK YOU SO MUCH LIV!!
Delicious and easy to replicate!
My daughter loved em!
thank you so much!!!
can you make these and then freeze them? of course they are likely to be better when fresh but just wanted to check before I make these in bulk!
Yes you can!!! You can also freeze the dough, thaw then cook too!
Amazing. I have limited experience with making dough of any kind. I was making for dinner but we ended up eating for an afternoon ‘snack’. I added Maria’s Arayes lamb meat before the second rise. It was so good. I would not change a thing.
this makes me so happy!!! thank you so much!
I’ve made these twice now for big family and friend gatherings, these were definitely the star of the show. I am not a bread maker so I was a little nervous trying my hands at these but honestly not that hard at all and so worth the effort!
right!!! AREN’T THEY SO EASY! love this for you so much!
Τέλειες πιτούλες! Όλες σου οι συνταγές είναι εύκολες και πεντανόστιμες!
thank you so much!!!
At what step can you pause before cooking if you don’t want to cook them right away?
after the last rise, instead of flattening them you can put them into the fridge for max 24 hours. You could also flatten them, freeze, thaw and cook too!
I have a dairy allergy you think whole milk could be subbed with soy or a dairy free milk?
I would use the highest fat dairy free milk you can find
I tried the recipe today for the first time and I loved it! I had my doubts with how my dough turned out, but they ended up tasting incredible! I made the with spanakopita filling! I definitely have to try them again!! Truly, the best homemade πίτες!! Another favorite Greek food!
Thank you so much, ana!!!
Light, fluffy, amazing!!!
thank you so much!!!