Greek Recipes
How To Make Greek Yogurt
Prep
20 minutes
Yield
2 cups
Did you know it was so easy to make your own Greek Yogurt? This recipe takes 2-ingredients, and it's so delicious.
There is nothing more rewarding than making a staple ingredient in your fridge yourself, from scratch. This Greek Yogurt recipe takes some time to make but it’s totally worth it. It tastes SO much better than what you find in the store, and you can enjoy it knowing that you made it yourself. This guide will teach you exactly how to make Greek yogurt.
Why Make Homemade Greek Yogurt?
- Healthy: Greek yogurt is a great source of protein and can be such a versatile ingredient to use in baking and cooking.
- 2-Ingredients: This Greek Yogurt recipe only takes 2-ingredients to make – milk and Greek yogurt. When you buy Greek yogurt in the store you often see a long list of other added ingredients, sugars, etc. so making it on your own you know what goes into it.
- Easy: Although this is a time-consuming process as it requires resting time, the actual prep is only 20-minutes. You’ll be surprised at just how easy it is to make Homemade Greek Yogurt, plus, it’s cheaper!
Easy Greek Yogurt Recipe: Step-by-Step Guide
Ingredients You’ll Need
Milk – Greek Yogurt requires whole milk in order to make it thick and creamy. Full-fat Greek yogurt is made with whole milk while nonfat or fat-free is made with skim milk.
Greek Yogurt – In order to make yogurt you’ll need a starter. You can buy powdered starter but just using some store-bought yogurt works just as well.
Equipment for Success
Heavy-Bottomed Pot or Dutch Oven – This is crucial for heating milk. A heavy-bottomed pot or Dutch oven will prevent scorching. You want to make sure that the pot is large enough to hold your desired liquid.
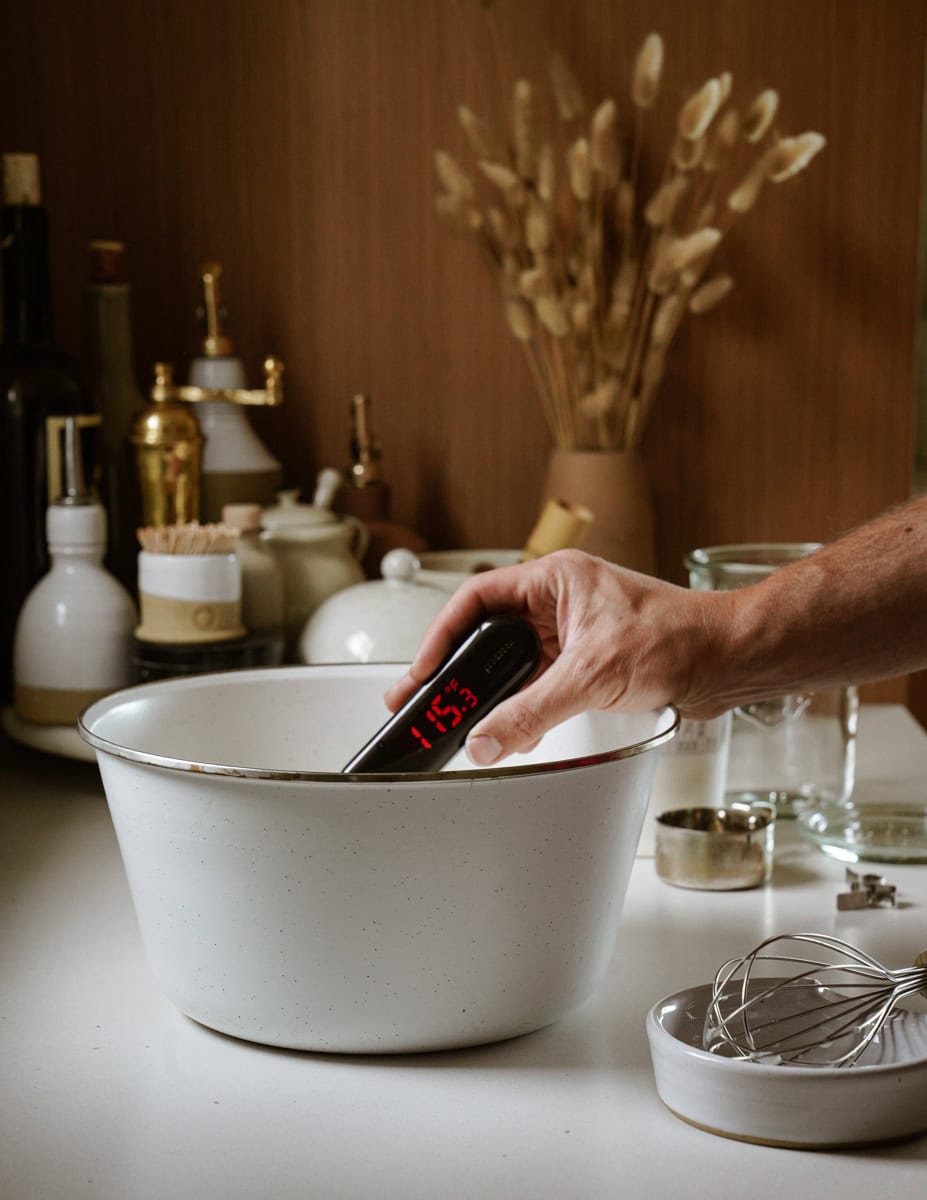
Instant-Read Thermometer or Candy Thermometer – Temperature is KEY to making yogurt so having a thermometer can help ensure you have the right temp. You need to heat the milk to 180°F to denature proteins and kill unwanted bacteria, and then cool it down for a starter culture.
Whisk or Spoon – For stirring the milk as it heats to prevent scorching, and for incorporating the starter culture. Avoid aluminum as it can react with the milk.
Heat-Safe Container – After cooling the milk and adding the starter, you need a clean, non-metal container to hold the yogurt during its incubation period. Glass jars, ceramic bowls, or food-grade plastic containers work well.
How to Make Greek Yogurt:
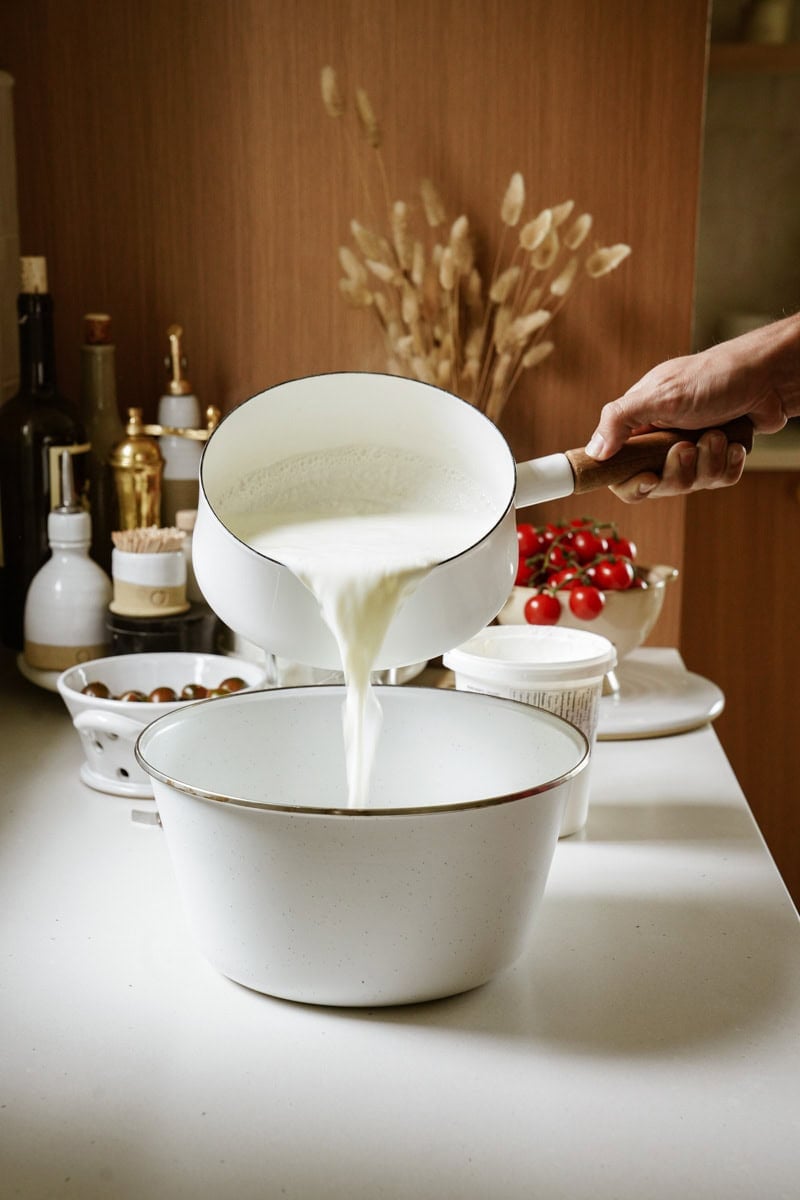
2. To a medium pot add the milk and put on medium-high heat. Heat, stirring fairly often to keep skin from forming on top/milk from burning. Use a thermometer to determine when it hits 180F and remove the pot from the heat when it does
Tips and Troubleshooting for Perfect Greek Yogurt
Achieving Your Desired Thickness
To get the right thickness of your Homemade Greek Yogurt, you’ll want to make sure you’re using the right milk. Milk with higher fat content like whole milk will give you a nice creamy texture. You’ll also want to avoid ultra-pasteurized milk as it’s already been heated at high temperatures which can denature the proteins in a way that makes it harder for the yogurt to set.
Another key to the right thickness of your yogurt is heating the milk to a high temperature. This ensures that your milk denatures the whey proteins, preventing them from interfering with the casein proteins (the main proteins in milk that form the yogurt’s structure) during fermentation.
Last but not least, your starter is important. Use a store-bought yogurt that has live active cultures in it and ensure that you don’t use too much. Using too much starter can actually lead to thinner consistency and a more sour flavor.
Inactive or Dead Starter Culture
The start yogurt or culture you use may not have enough live active bacteria or be too old. This will cause your yogurt to not set or have the desired benefits or texture. You want to make sure that you use fresh starter, plain and unsweetened yogurt, and if you’re using an old starter that you “wake it up” properly before using.
Lumpy or Curdled Yogurt
Lumpy or curdled yogurt is caused by over-fermentation (too long or too hot incubation) or inconsistent temperatures. Rapid heating can also cause graininess. To prevent this from happening you’ll want to heat the milk slowly, and reduce the incubation time or temperature for future batches. Whisk gently after chilling to smooth out the lumps.
Excessive Whey Separation
This is a very common issue when making yogurt. This can be caused by incubating for a long time or at a slightly higher temperature. It can also happen with old milk or if the yogurt is disturbed. All you need to do is strain the yellow liquid off and next time reduce the incubation time
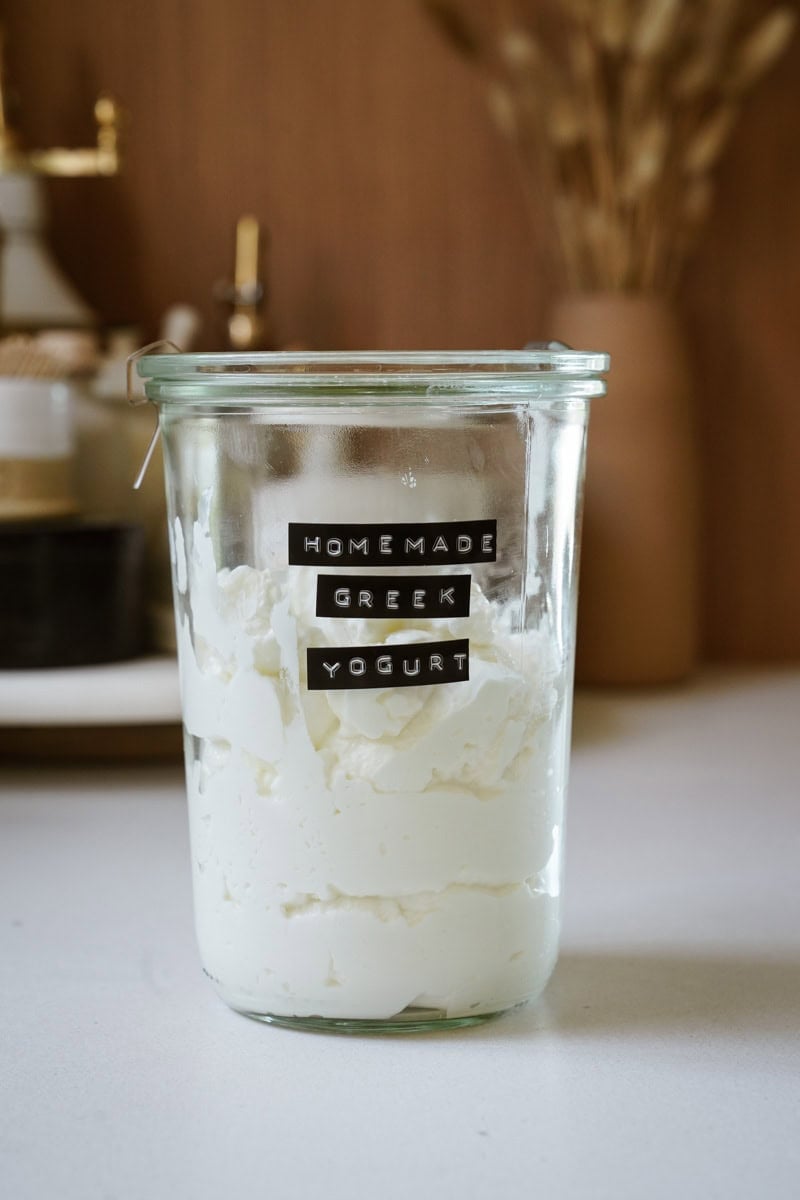
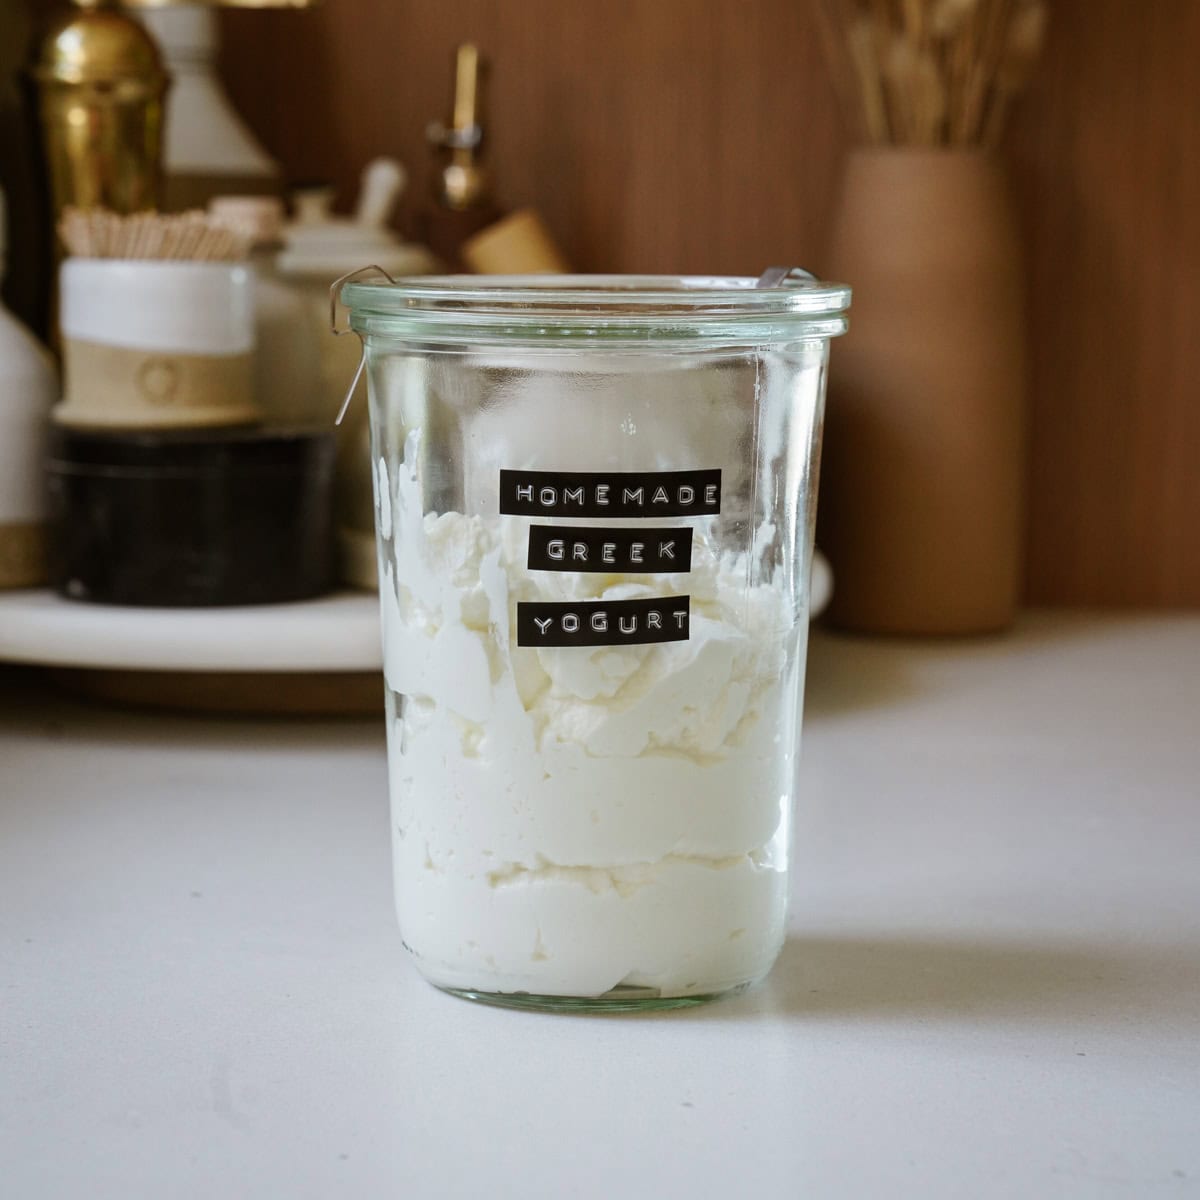
Storing Your Homemade Greek Yogurt
Store leftovers in an airtight container or mason jar in the fridge for up to two weeks. I like storing it in glass the best but you can totally use repurposed Greek yogurt containers.
Delicious Ways to Use Your Homemade Greek Yogurt
There are so many ways you can use Homemade Greek Yogurt. It is great to use in both sweet and savory dishes. Here is some inspo:
- Mix in honey, fruit or jam to sweeten it up
- Serve with a homemade granola or cereal
- Dollop on top of a fruit crumble like this Apple Crumble recipe
- Use it in place of sour cream in any sweet or savory dish
- Lower the amount of mayo you put in a recipe by adding half mayo, half Greek yogurt
- Use it in a marinade like this Greek Chicken Marinade
- Make a tasty frozen yogurt
- Add it into smoothies for a protein boost and a creamy texture
- Make homemade Greek Tzatziki Sauce
🤔 Common Questions
Totally! It’s less wasteful, it’s creamier, fresher, and most importantly, more cost-effective.
Absolutely! It’s a quick and easy way to make your yogurt last longer. You can put it in an airtight container for up to 2 months.
A cheesecloth will be the easiest but you can try coffee filters or strong paper towels. However, both of these options can break easily when wet so they may end up causing you a headache.
You’ll know your homemade yogurt has incubated long enough when it appears set and pulls away cleanly from the sides of the jar when gently tilted.
To make your yogurt tangier, increase the fermentation time or slightly raise the incubation temperature, as the bacteria produce more lactic acid over longer periods or at warmer temperatures. For a less tangy yogurt, shorten the fermentation time.
Likely do to due to insufficient straining, or because the milk wasn’t heated adequately and fermented at the wrong temperature. To fix this, strain your yogurt longer to remove more whey and ensure proper milk heating and fermentation temperature.
Your Greek mommy that is. 😍 Step into my kitchen to learn how to make yummy Greek food. 🍽️💃

How To Make Greek Yogurt
Video
Ingredients
- ⅓ cup plain full fat Greek yogurt (with live and active cultures)
- 4 cups whole milk
- 4-5 pieces of cheesecloth
Instructions
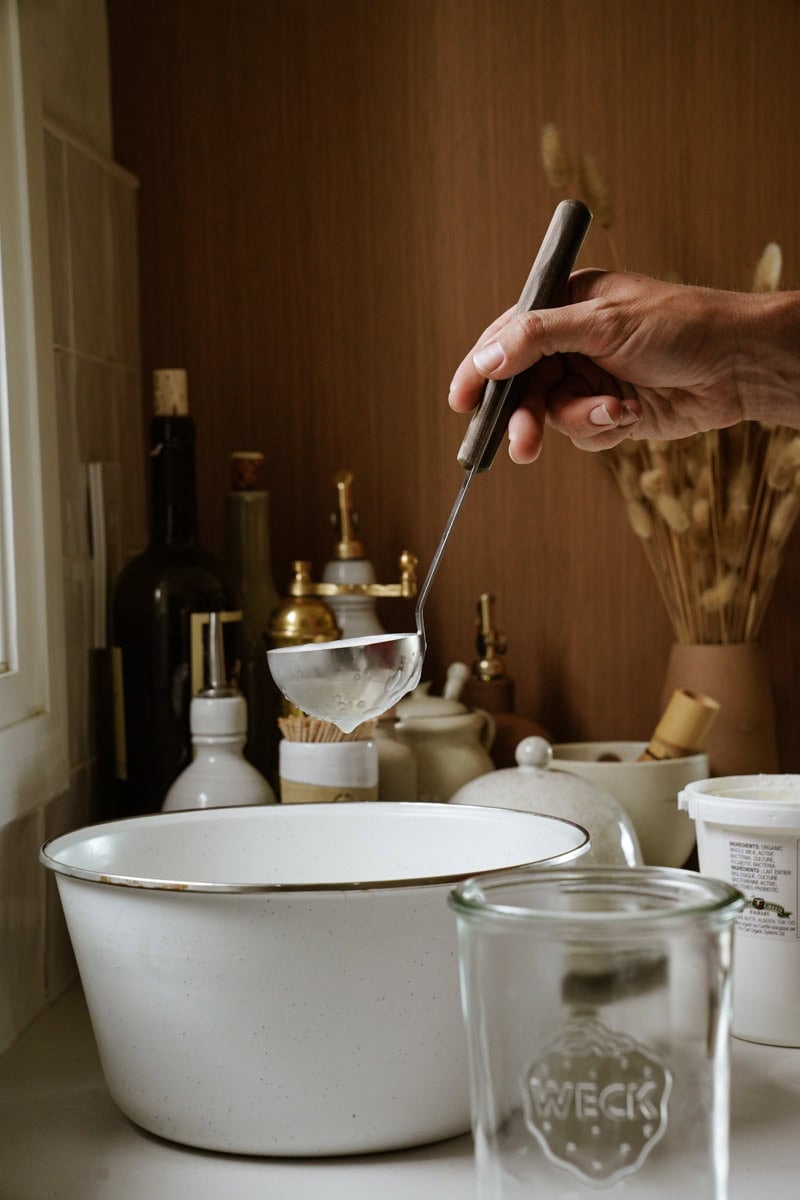
- In a small bowl add 1/3 cup plain Greek yogurt and set aside.
- To a medium pot add the milk and put on medium-high heat. Heat, stirring fairly often to keep a skin from forming on top / milk from burning. Use a thermometer to determine when it hits 180F and remove the pot from the heat when it does
- Pour the milk into a bowl and let it cool until it reaches 115F. Stir it a few times to prevent a skin from forming on top of the milk.
- Once it reaches 115F, scoop out 1/2 cup into the bowl with plain Greek yogurt and stir to thoroughly combine. Pour this mixture back into the bowl with the milk and stir to fully combine.
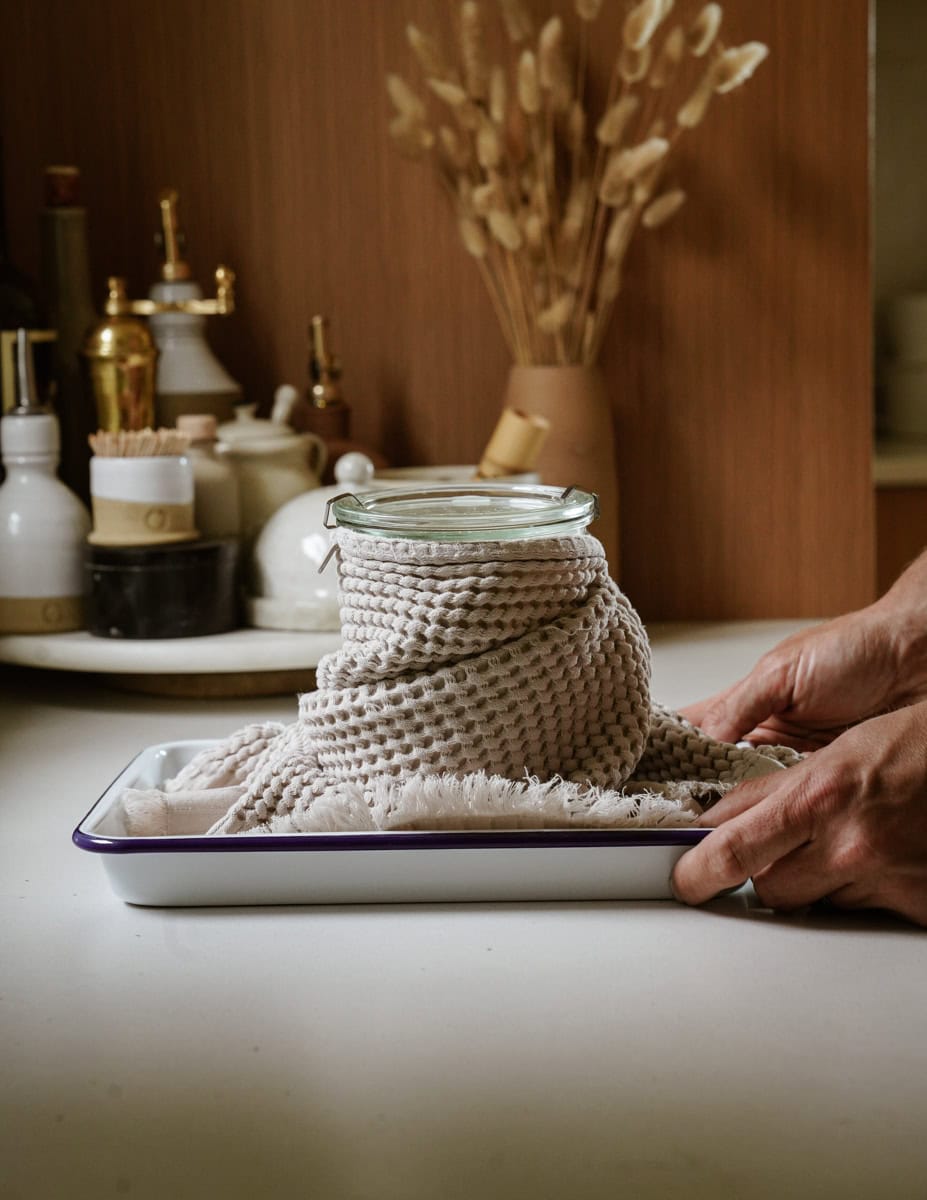
- Cover the bowl with cling wrap and put the warmest towel you have around it. Place it on a baking sheet.
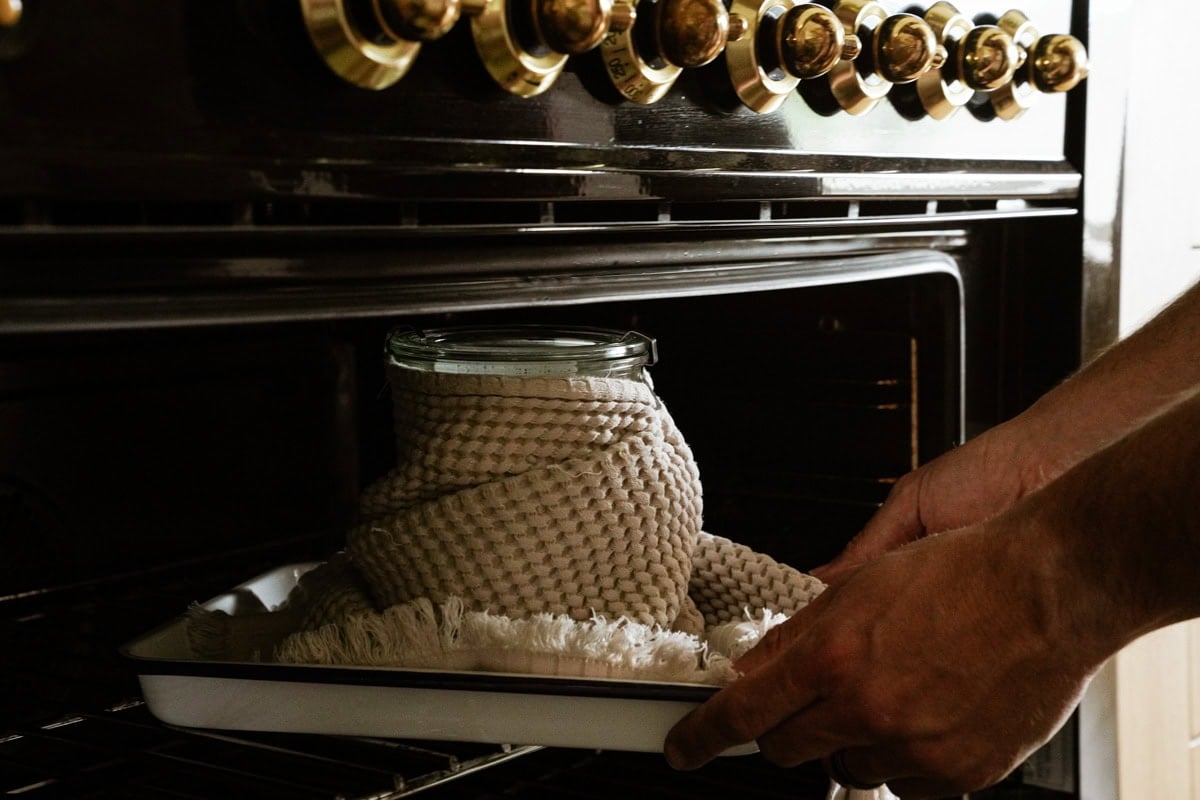
- Turn the oven to 150F for 5 minutes and then turn it off. Turn the oven light on and put the towel wrapped bowl on a baking sheet in the oven. Let sit for at least 8 hours and up to 12 hours. *See notes below for other resting options than the oven*Then remove from the oven and refrigerate for about 2 hours until the yogurt is cold.
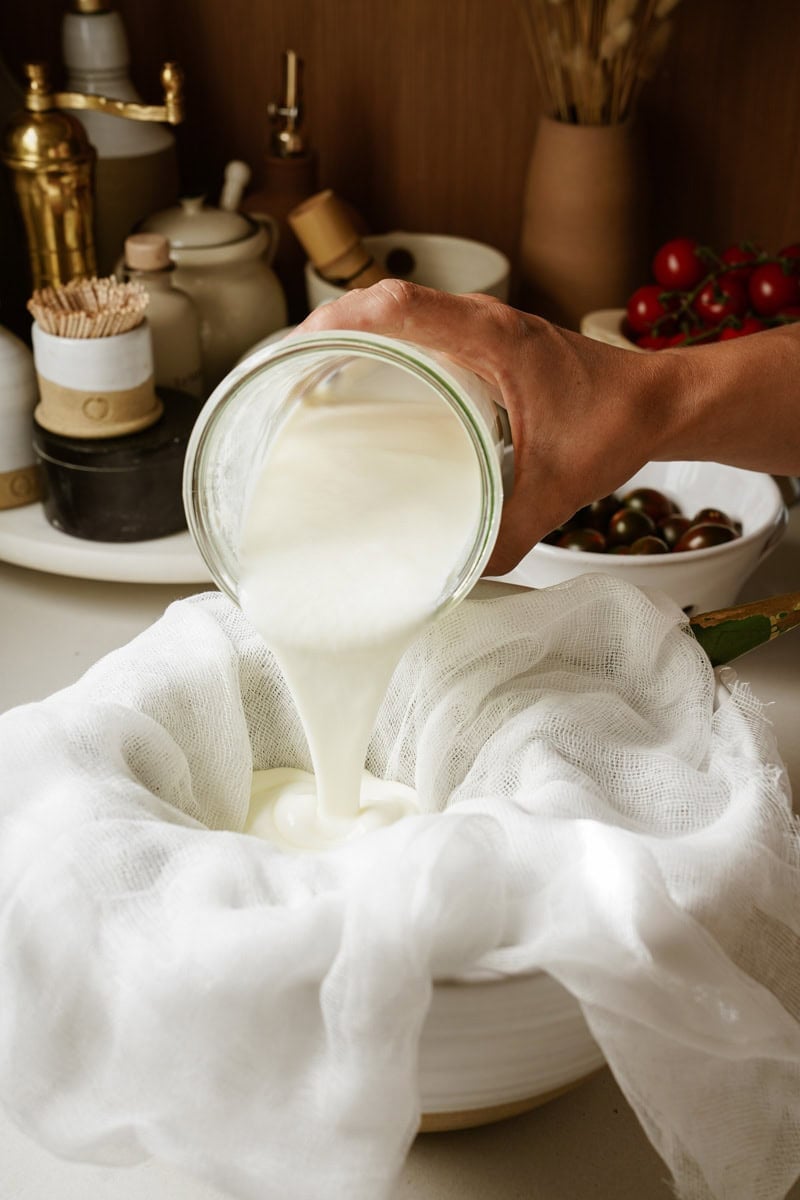
- Place a large strainer over a bowl and line it with 4-5 layers of cheesecloth. Pour the yogurt into the strainer and then cover the bowl with cling wrap or cheesecloth. OR place in a cheesecloth and hang it over a bowl. Refrigerate for at least 4 hours to overnight, depending on how thick you want it. The longer you leave it, the thicker it will be.
Notes
- If you don’t have an oven to use to keep the yogurt warm, you can use a warmed but turned off and unplugged crockpot. Pour the milk and yogurt mixture into there and then cover with the lid. Wrap the crockpot in a towel and leave it for 8-12 hours. Then follow the remaining instructions starting from putting this mixture into the fridge for 2 hours (transfer to a bowl).
- Enjoy Greek yogurt for breakfast or use it to make Greek Tzatziki Sauce


Looking forward to making this. Have you used other types “milk” ie: sheep, soy, almond? I didn’t see any comment about using a starter once you have made the initial recipe. Finally, have you ever used a heating pad to keep the yogurt warm? Proofing things is a challenge in my home. Thanks for the great recipes. Keep them coming!
Hey Millie! I haven’t tried other milks yet but it will be on our list! Yes, so the starter would work the same way as you did for the initial recipe. 1/3 cup of the yoghurt. Then you’re sorted. It’s in the notes I believe. As for proofing, did you see the note about the slowcooker notes or using an oven?
Thanks for the comments. I’m going to try sheep’s milk this week with the crockpot. Should be fun!
please report back ok!!?!?
Millie, if your concern is lactose, I have made this very successfully using a lactose free milk (Fairlife, whole milk).
EXCELLENT! Thanks for shareing!
Thank you so much!
Your recipe is much too hard. I never strain mine and I leave the yogurt that I mix in the milk out over night to get stronger. By the way my parents were from Turkey (Greek). They make great yogurt also.
I did do that. That’s lovely.