Breakfast
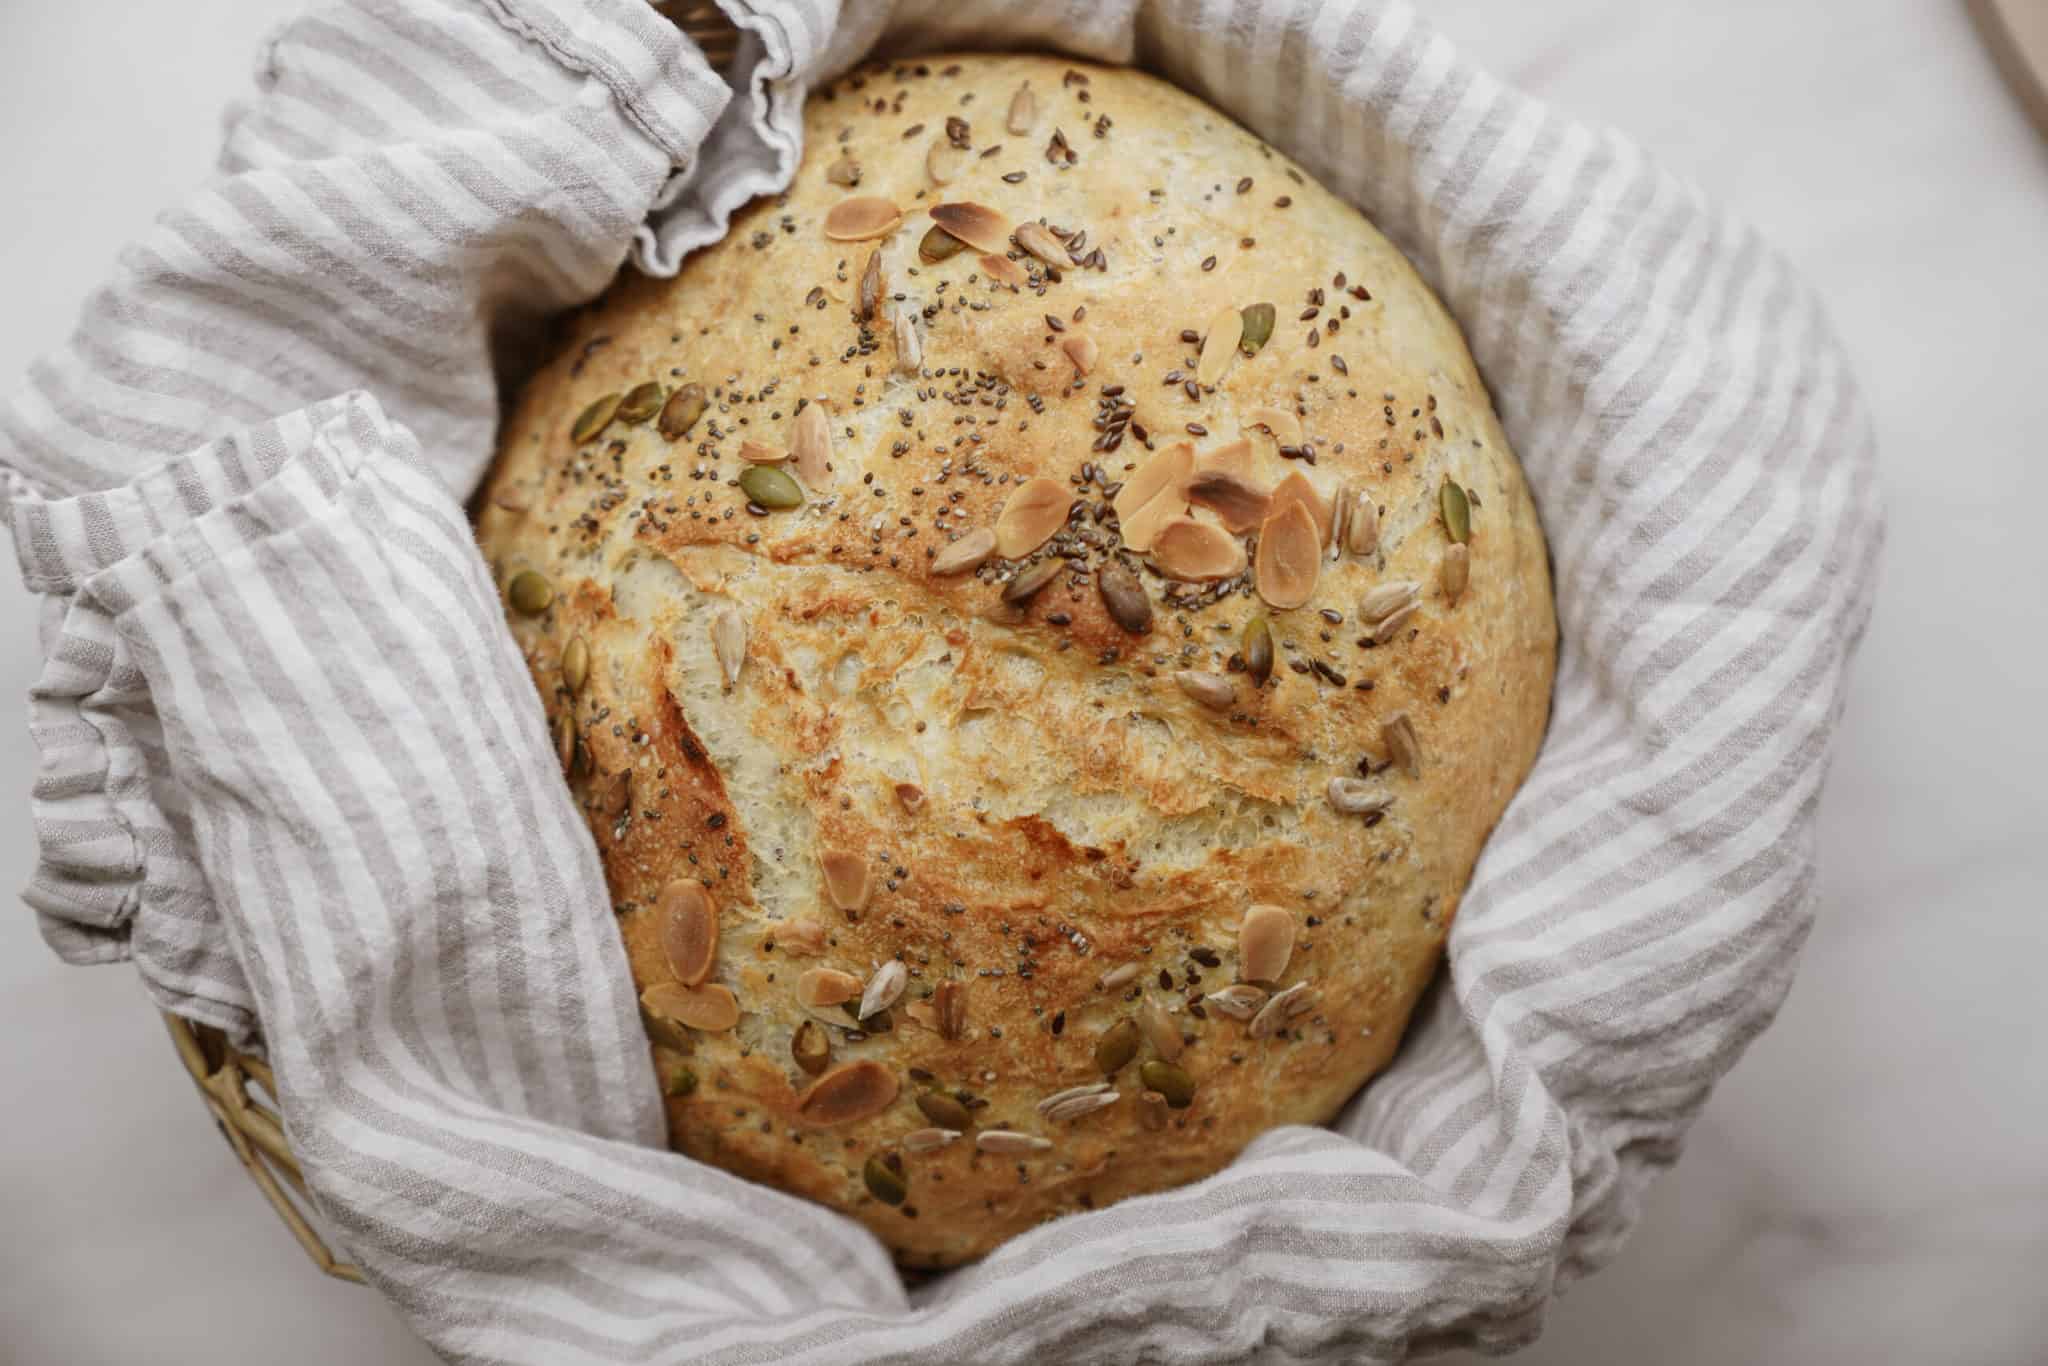
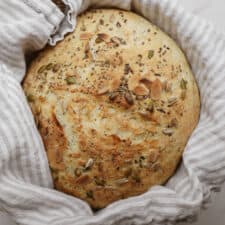
Dutch Oven Bread (No-Knead, Crusty Artisan Loaf) 🍞
Prep
10 minutes
Cook
35 minutes
Yield
1 loaf, 10 pieces
🍞 Stop buying expensive artisan bread! This crusty dutch oven bread needs zero kneading and tastes like a bakery loaf. Your kitchen will smell AMAZING!
This no-knead Dutch oven bread recipe is one of my favorites. You can make this multi-seed bread easily in your Dutch oven. It’s super easy, and there’s no better smell than fresh bread baking. Because it requires no kneading, it’s perfect for beginners. The crusty artisan loaf comes out restaurant-quality every time. Am I right?
❤️ Why You’ll Love Dutch Oven Bread
- No-Knead: This easy Dutch oven bread recipe eliminates the hard kneading work.
- Crusty: The Dutch oven creates a beautiful artisan crust.
- Versatile: Customize with seeds, herbs, garlic, or leave plain.
- Delicious: Fresh bread works for sandwiches, toast, or plain slices.
- Simple: This no-knead Dutch oven bread uses minimal ingredients.
🍲 Ingredients
Flax Seeds – Flax seeds are amazing for your health. They’re high in omega-3 fatty acids, antioxidants, fiber, and plant protein. Additionally, they’re so easy to add to this bread recipe. You can sprinkle them on top of any food or baked goods.
Chia Seeds – Chia seeds are equally beneficial for overall health. They contain antioxidants that help lower your risk of certain health conditions. Additionally, they’re high in fiber like their flaxseed friends. They can be thrown into just about anything you make.
Pumpkin Seeds – Pumpkin seeds are rich in vitamins like manganese and K. These minerals are essential in helping wounds heal beautifully. Additionally, pumpkin seeds contain zinc, supporting immune system function. So this crusty Dutch oven bread becomes more nutritious overall.
👩🍳 How to Make Dutch Oven Bread
Step 1: In a large bowl, combine the flour and seeds. Combine everything and make a well in the center. The well creates a space for your wet ingredients. This helps the dough come together evenly.
Step 2: In a medium-sized bowl, combine warm water, sugar, yeast, and salt. Whisk together until all ingredients are thoroughly combined. The water should be warm, about 110°F. Use instant yeast for this no-knead Dutch oven bread recipe. Regular active dry yeast will significantly prolong the rising time. Make sure all ingredients dissolve in the water.
Step 3: Pour the water-yeast mixture into the well in the large bowl. Pour slowly so the mixture doesn’t overflow. This method helps the dough combine evenly and thoroughly.
Step 4: Stir with a wooden spoon until it begins to come together as a dough. Keep stirring until the dry ingredients are mostly incorporated. The mixture will look shaggy and rough at this point. Continue stirring until no large dry patches remain visible.
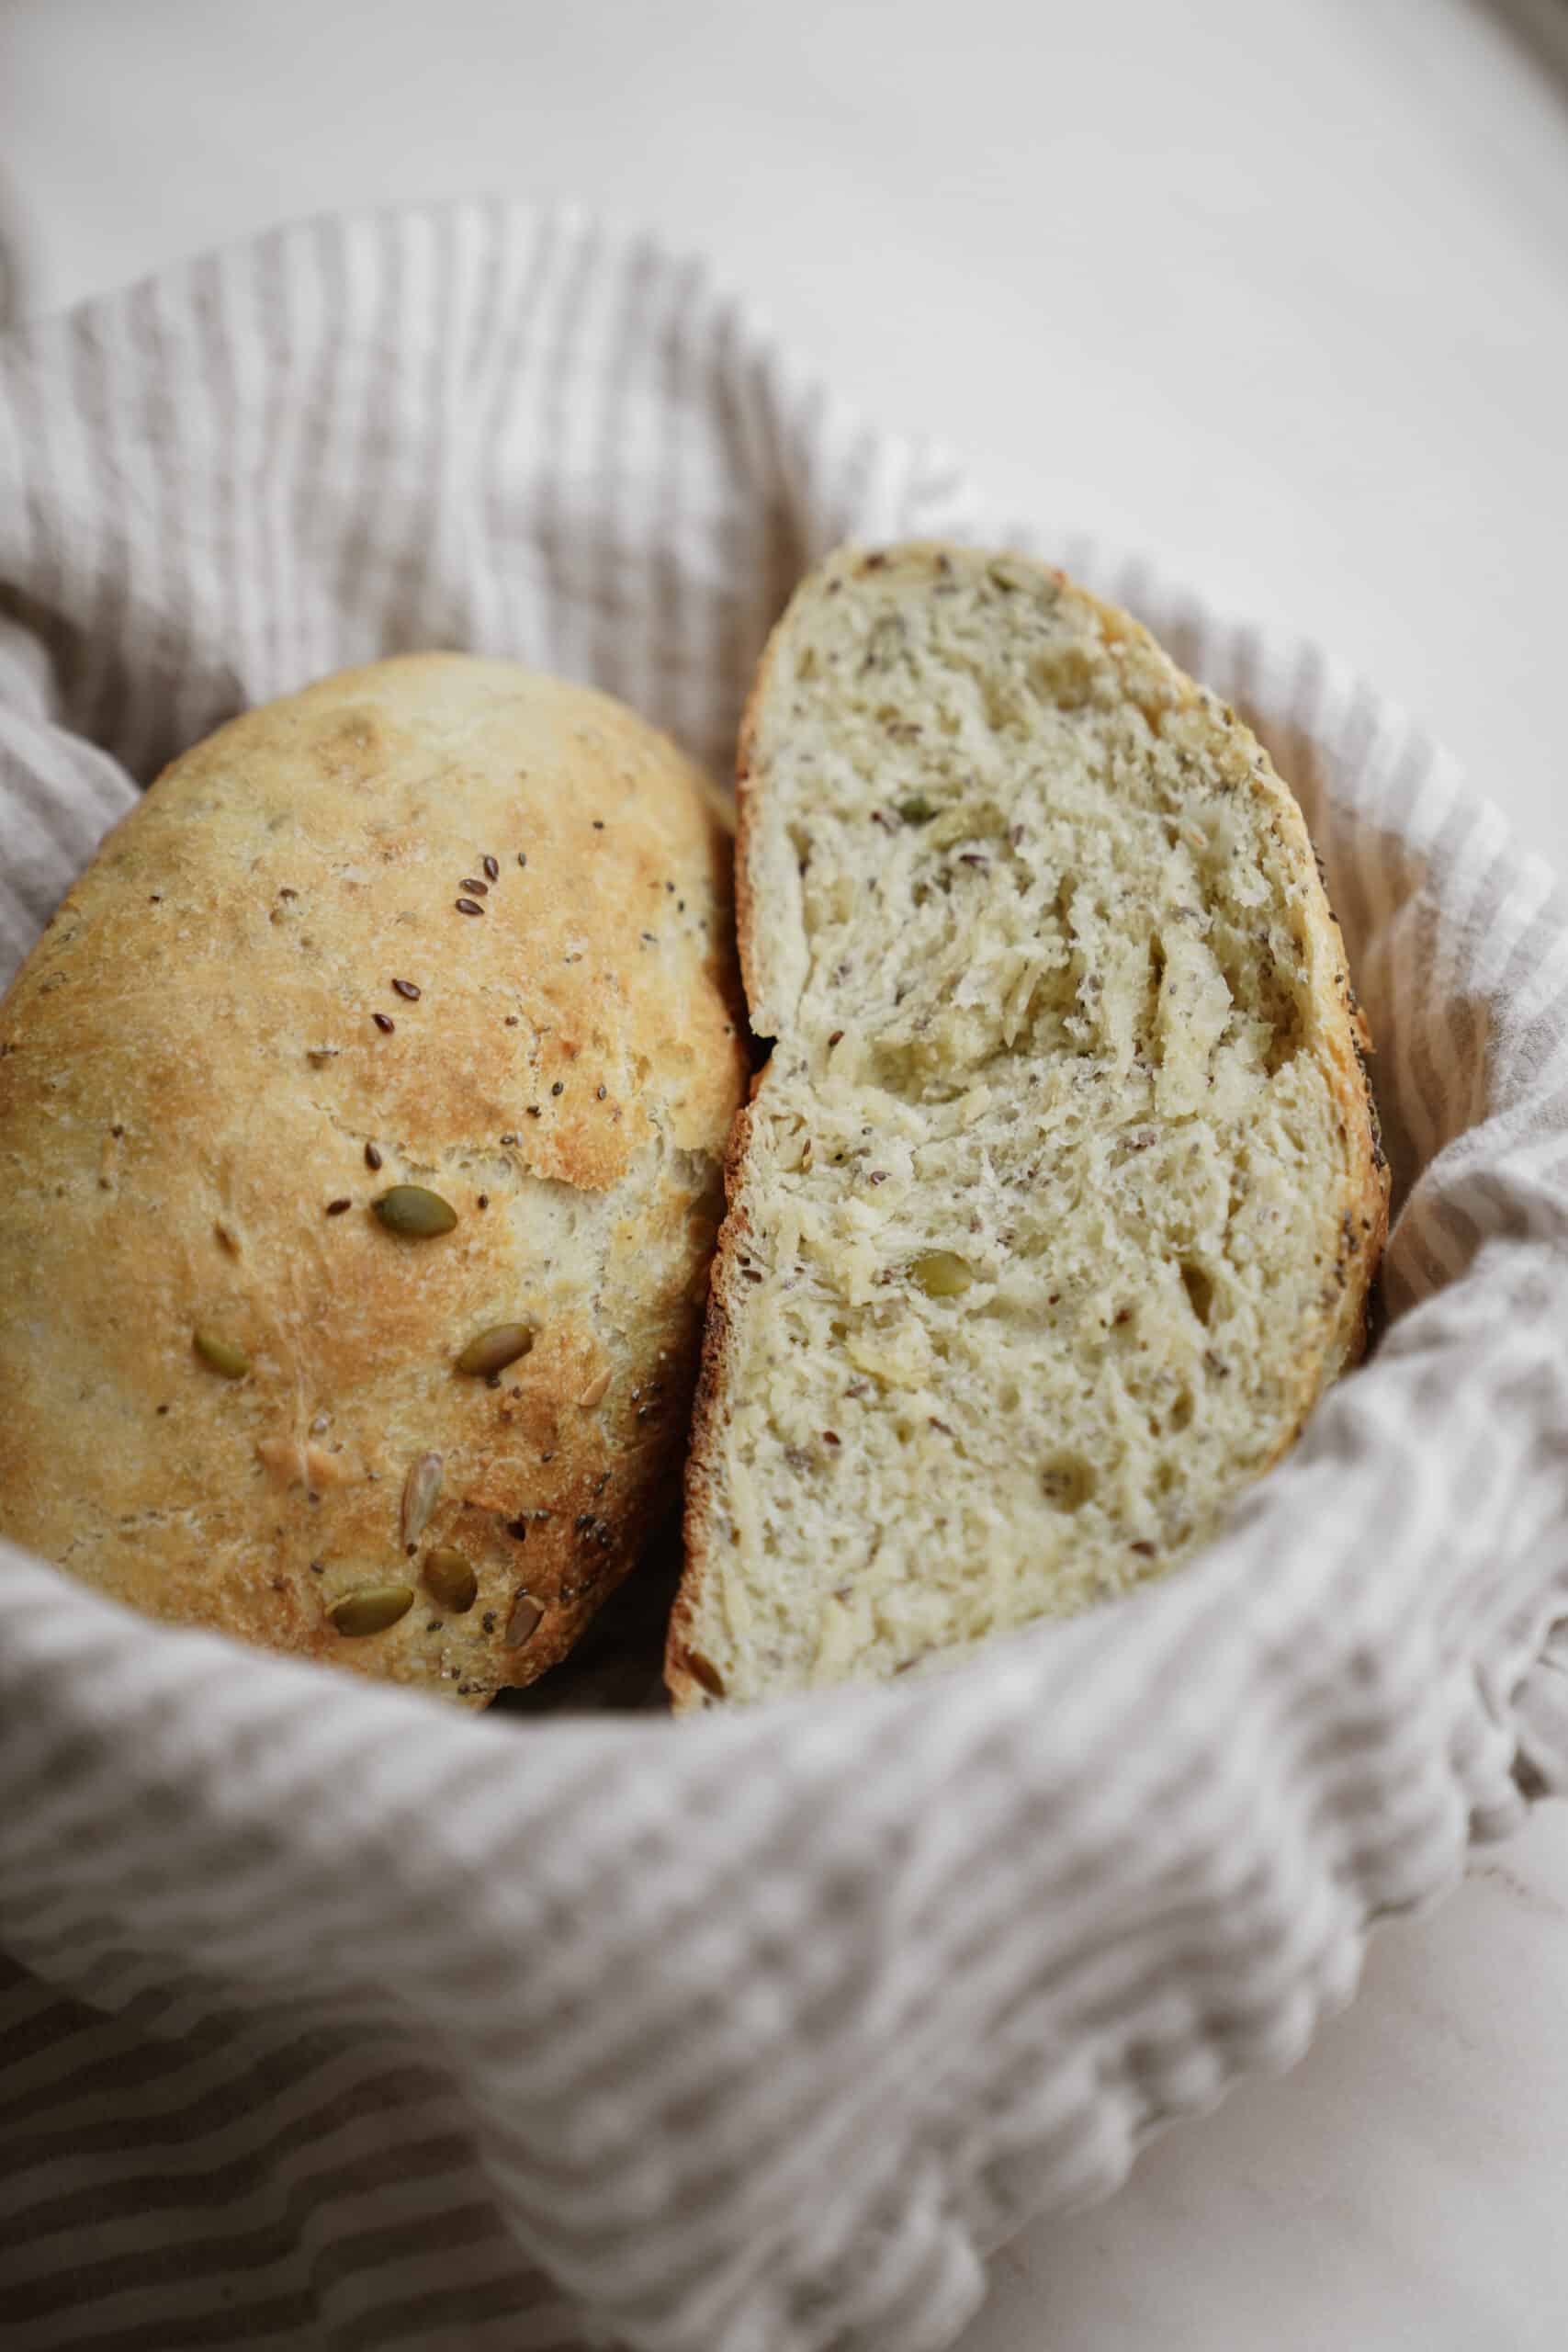
Step 5: Transfer the dough to a floured surface and work together for 3 minutes. Work until no flour streaks remain throughout the dough. Add more flour if it’s too sticky for handling. Add more water if it seems too dry and stiff. The dough will be soft and look between bumpy and smooth. This is correct—don’t overmix or knead aggressively here. The dough has about 75-80% hydration, making it quite wet. This creates the open crumb structure in the final loaf.
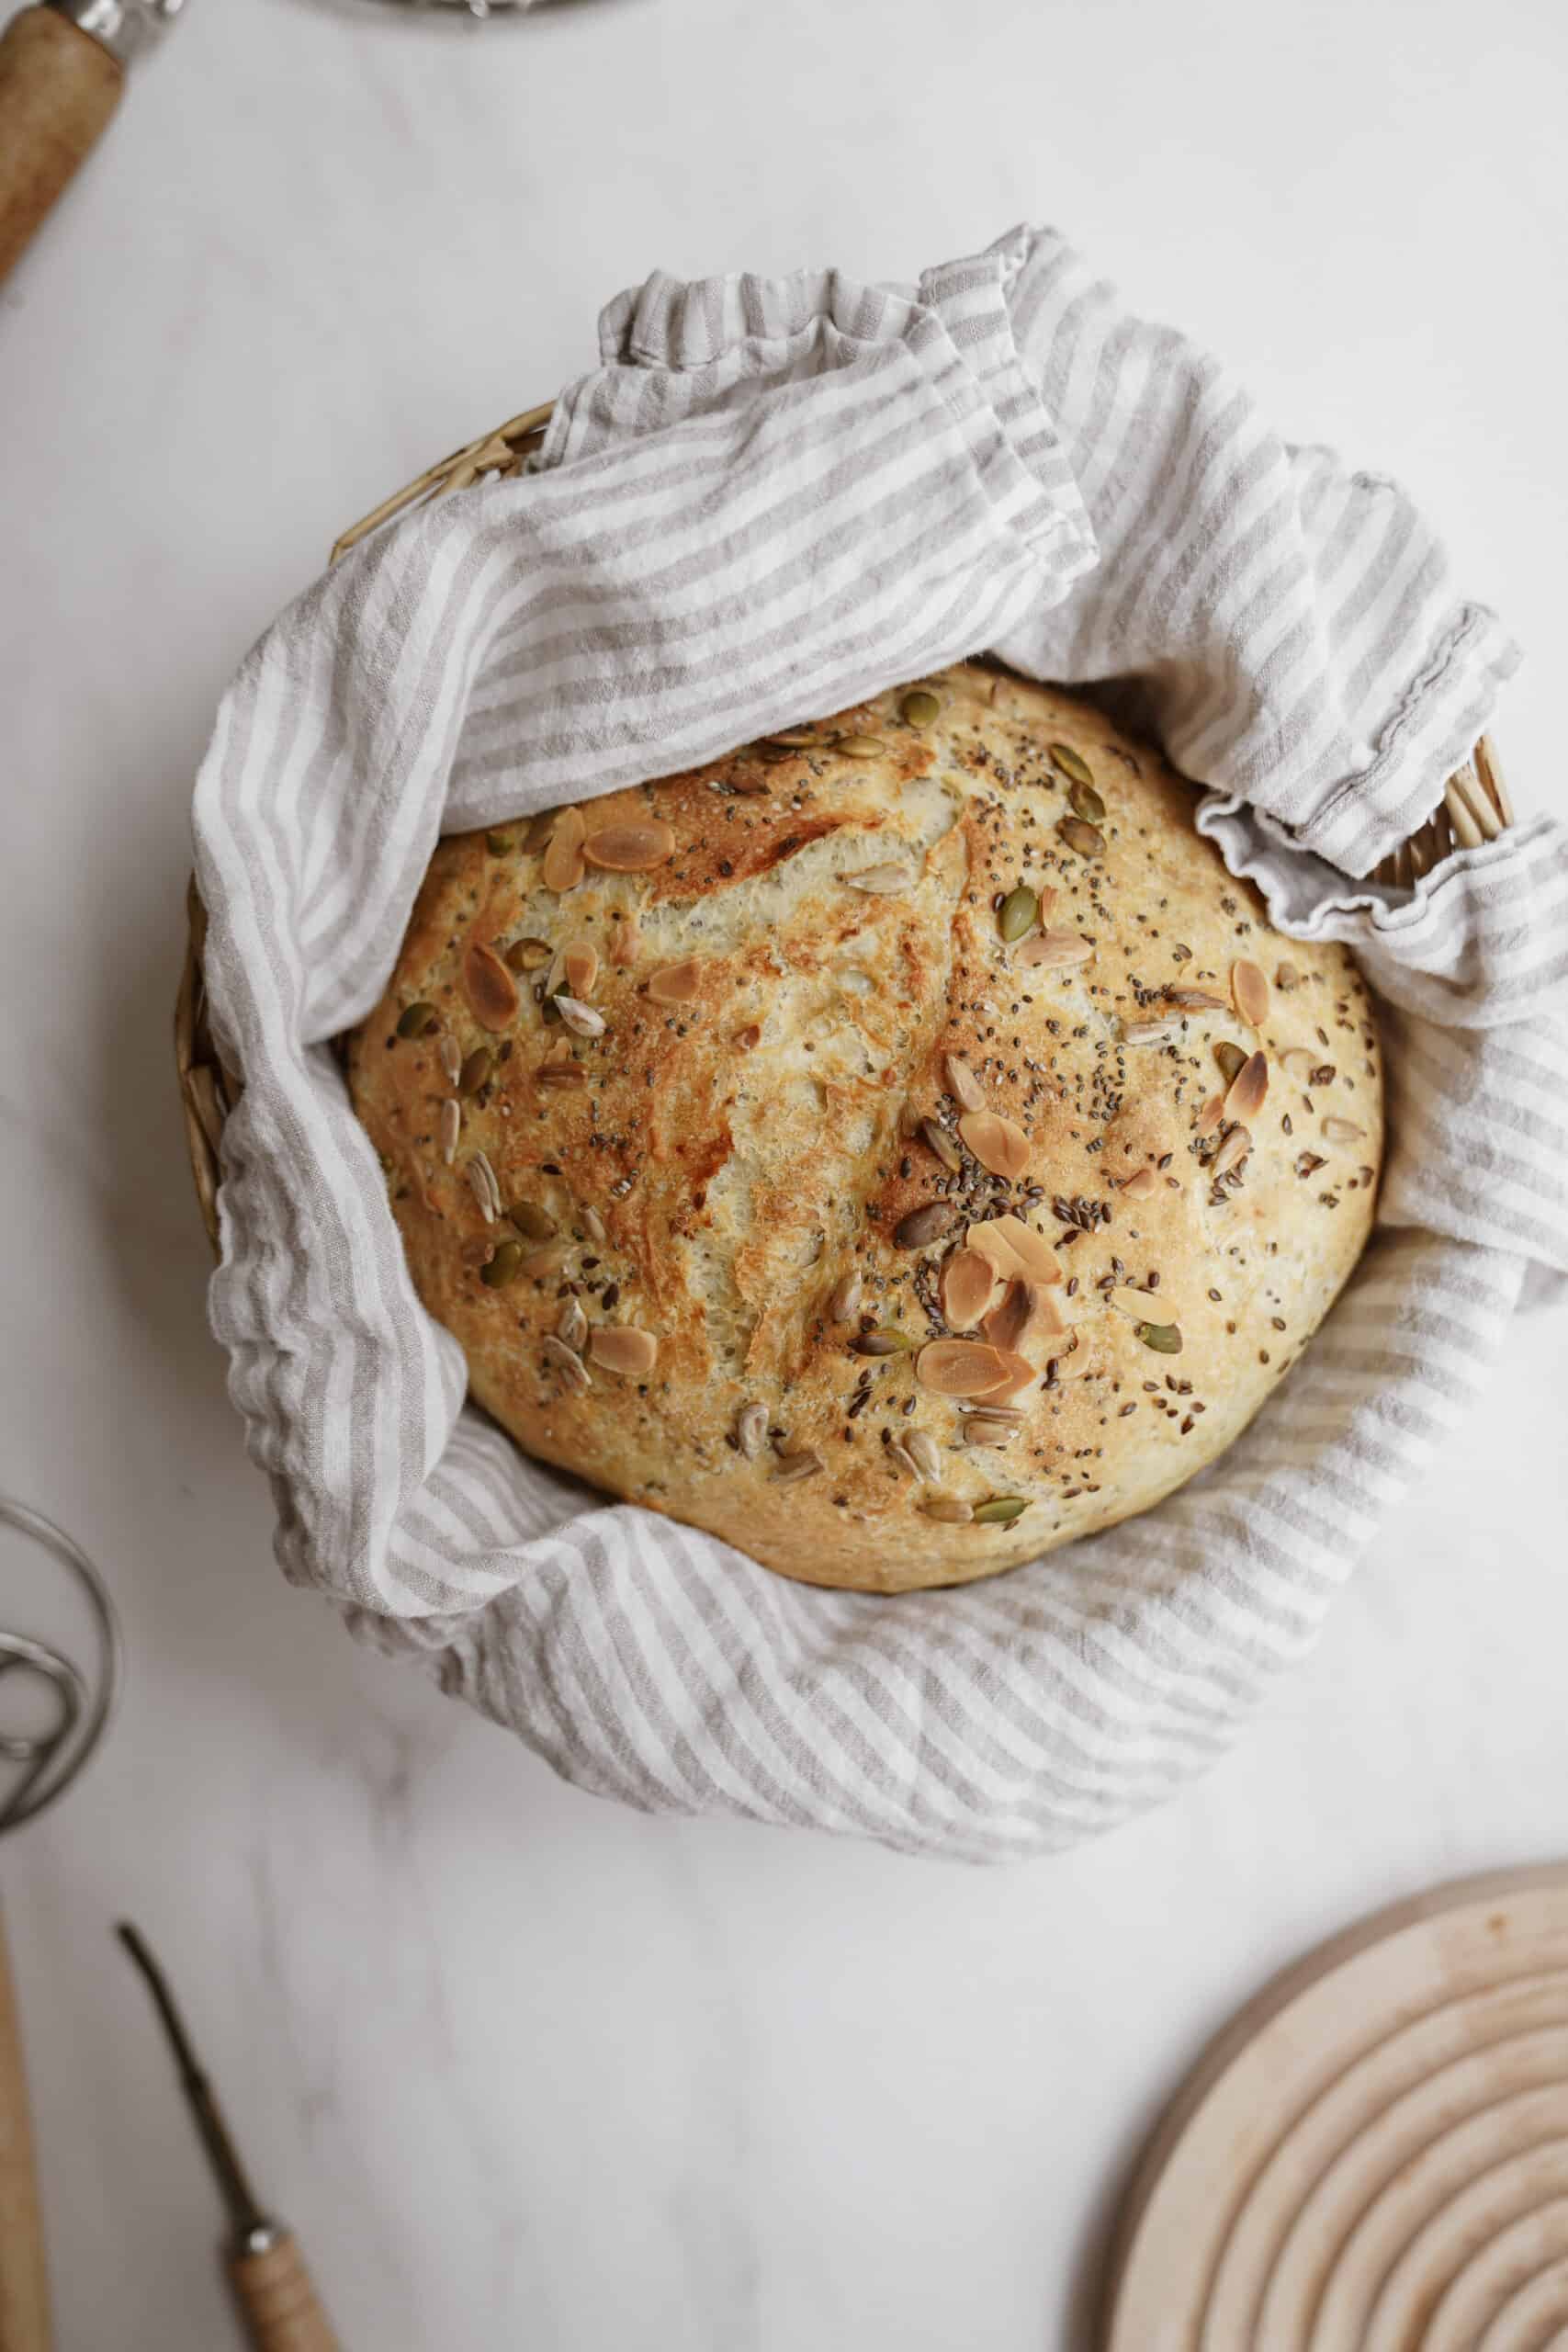
Step 6: Roughly form the dough into a round and transfer to a lightly oiled bowl. Gently cover with plastic wrap and a tea towel. Let the dough rise at room temperature for 1½-2 hours in a warm place. The dough should double in size during this time. This is the bulk fermentation phase. Once doubled, carefully turn the dough onto the parchment paper. Score the top with a sharp knife using an X or slash pattern. Scoring allows steam to escape and creates ear development.
Step 7: Preheat your Dutch oven to 450°F for 30-45 minutes. The pot must be very hot for proper crust development. Carefully transfer the parchment with the dough into the hot Dutch oven.
Step 8: Bake covered with the lid for 30 minutes. The lid traps steam, creating that crusty exterior.
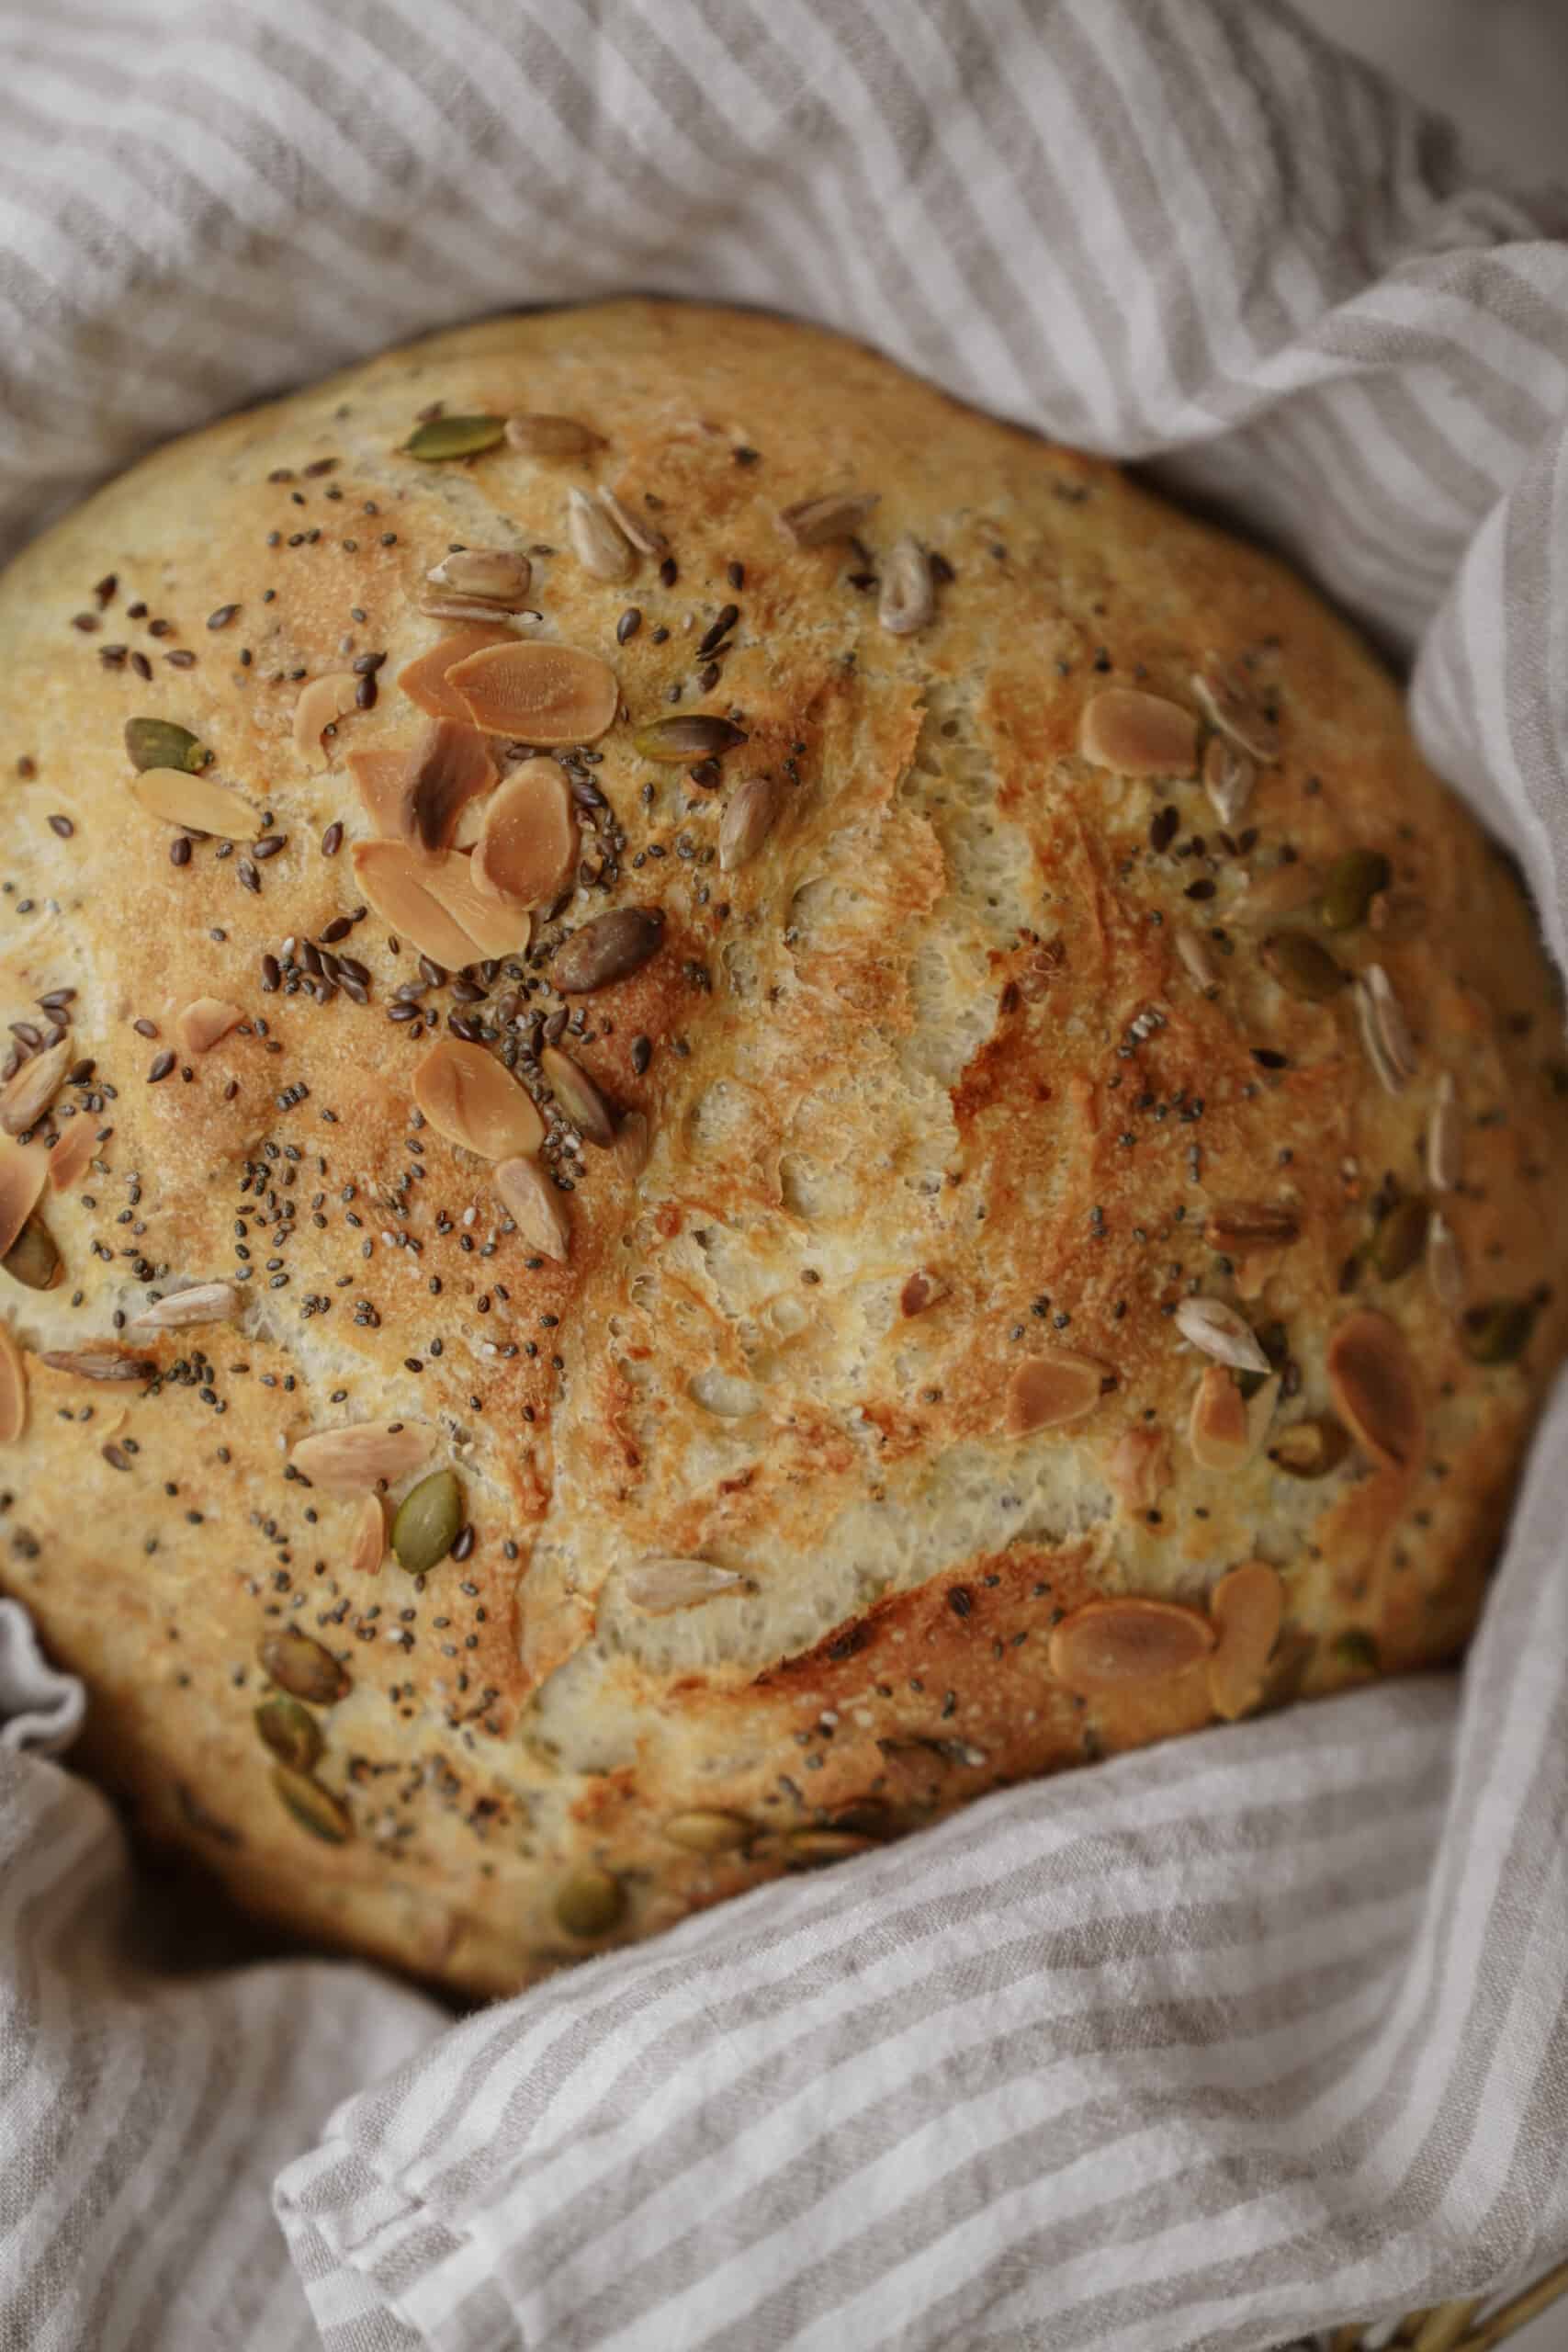
Step 9: After 30 minutes, remove the lid and bake for 10-15 minutes longer. This allows the crust to deepen in color and harden. Check that the internal temperature reaches 205-210°F for doneness.
Step 10: Remove from the oven and transfer to a cooling rack. Let cool completely, at least 30 minutes, before slicing. Cooling allows the interior crumb to set correctly.
🗒 Tips and Tricks
- Mix-Ins: Swap, add, or change any nuts and seeds. Choose your favorite and customize your dutch oven bread recipe. Use about ½ cup total mix-ins for this loaf.
- Yeast Types: Use only rapid-rising (instant) yeast for this recipe. Regular active dry yeast will prolong the rising time. The results and timing will change significantly otherwise.
- Hydration: This dough has about 75-80% hydration, making it quite wet. Wet dough creates a more open crumb structure beautifully. Don’t add extra flour unless necessary.
- Proofing Temperature: Keep dough between 70-75°F for optimal rising. Warmer spots speed up proofing significantly. Cooler spots slow it down considerably.
- Stretch and Folds: Optionally do stretch-and-folds during bulk fermentation. Every 30 minutes for the first 2 hours. This strengthens the dough without the need for traditional kneading.
- Cold Rise Option: Make the dough the evening before and refrigerate. Let it rise overnight in the fridge instead. This develops more flavor and actually improves the crust.
- Crust Thickness: For a thinner crust, reduce uncovered baking to 8-10 minutes. For an extra-thick crust, bake uncovered for 15-20 minutes. Adjust based on your personal preference.
🗒 Substitutions
- Whole Wheat: Swap 25-30% of flour with whole wheat. Increase water by about 2-3 tablespoons. Whole wheat absorbs more water than white flour.
- Garlic-Herb: Add 2 teaspoons of dried herbs, such as rosemary. Include 3-4 minced garlic cloves for flavor. Press garlic into the dough during shaping.
- Everything Spice: Top with everything bagel seasoning before baking. Sprinkle on right before putting in the Dutch oven. This creates a delicious flavor combination beautifully.
- All Seeded: Use any combination of seeds you prefer. Keep the total amount around ½ cup. Sunflower, pumpkin, sesame, and flax all work great.
🍽️ Best served with
👝 How to Store Leftovers
To store your Dutch oven bread, wrap it tightly in plastic wrap. Store at room temperature for 2-3 days maximum. The bread stays fresher when wrapped fully. Do not put bread in the fridge as it dries quickly.
To freeze, slice the bread before freezing. This makes things easy when you want bread later. Store slices in a freezer-safe bag for up to 1 month. To refresh frozen bread, bake at 350°F for 8-10 minutes. This revives the crust and warms the interior beautifully. Let it cool slightly before serving your no-knead Dutch oven bread.
Troubleshooting Storage: If crust becomes soft, refresh in a 350°F oven. If bread gets gummy, extend cooling time before slicing. Let cool fully on a rack before wrapping.
🤔 Common Questions
Yes, absolutely preheat for 30-45 minutes at 450°F. The pot must be very hot for a proper crust. This creates the steam effect that gives crusty bread its crust.
Bread flour has more gluten, resulting in a chewier texture. All-purpose works fine for this no-knead Dutch oven bread. The difference is subtle—either works beautifully.
The dough has about 75-80% hydration, so it’s pretty wet. It should be sticky and slightly hard to handle. This wet dough creates a more open crumb structure.
Yes, you can flour a banneton basket instead. Transfer the dough directly into the hot Dutch oven. Be careful as the pot is extremely hot and dangerous.
Pale crust means the oven wasn’t hot enough. Ensure the Dutch oven preheats for the full time. Too hard crust means baking uncovered for too long. Reduce uncovered time to 10-12 minutes instead.
Add the seeds during the initial mixing with the flour. Add dried herbs or garlic during shaping. Press them firmly into the dough so they stick. Use about 2-3 teaspoons of herbs or 3-4 garlic cloves.
Gently lift and fold the dough over itself. Do this every 30 minutes during bulk fermentation. Repeat 4-6 times to strengthen the dough without kneading.
Yes, make the dough and refrigerate it overnight. Let it rise in the fridge for 12-16 hours instead. This develops more flavor and improves the crust.
Use a sharp knife to cut an X or slash. Score ¼ inch deep at a 45-degree angle. This allows steam to escape and creates ear development.
Dutch Oven Bread (No-Knead, Crusty Artisan Loaf) 🍞
Ingredients
- 1 ½ cups + 2 tbsp warm water 95 – 105 degrees F
- 2 ¼ tsp or 1 packet rapid rising yeast
- 3 tbsp sugar
- 3 cups bread flour OR all-purpose flour
- 1 tsp salt
- 2 tbsp almond slices
- 1 ½ tbsp pumpkin seeds
- 1 tbsp sunflower seeds
- 1 tbsp flax seeds
- 1 tbsp chia seeds
- + an extra sprinkle of all the seeds
Instructions
- In a large bowl, add the flour + seeds, combine and make a well in the center.
- In a medium-sized bowl, combine warm water, sugar, yeast & salt. Whisk to combine.
- Pour the water-yeast mixture into the well in the large bowl.
- Stir with a wooden spoon until it begins to come together as a dough.
- Transfer the dough to a floured surface and work together for 3 minutes, until no flour streaks remain. Add more flour if it is too sticky, and more water if too dry. The dough will be soft, and look between slightly bumpy and slightly smooth.
- Roughly form the dough into a round and transfer to a lightly oiled bowl. Gently cover in plastic wrap and a tea towel or cloth. Let the dough rise at room temperature for 1 ½ – 2 hours in a warm place until doubled in size.
Preheat the oven to 450F.
- Remove the dough from the bowl and place it on a floured counter. Lightly press down, fold four corners (the edges of the dough) into the middle, and form a ball. Remove it from the bowl and face the seam-side down, exposing the smooth side, onto a piece of parchment paper. Round the dough ball a bit more with your hands. Brush with water, and sprinkle more seeds on top. Use a small + sharp paring knife to make a small cut down the center of the loaf. Once the oven is at temperature, place the Dutch oven inside for 15 – 20 minutes.
- Remove the Dutch oven from the oven and take off the lid.
- Lift the edges of the parchment paper to carefully place the dough into the Dutch oven. Put the lid back on.
- Bake for 30 minutes, remove the lid and bake for another 5 minutes until nice and golden!


this was super easy and our family devoured it in one whole day. I slathered mine in butter (multiple slices!!) and the kids had PB&J toast
thank you so much!
what does the dutch oven do that a regular loaf pan doesn’t?
I don’t own a dutch oven so I just baked this in a regular loaf pan and it was nice
it totally works in both but the dutch oven holds heat and circulates it really well for a perfectly crusty on the outside and perfect inside!
Is it ok to add extra seeds and mix them into the dough? I love seedy bread thats why im wondering
totally, have fun with it!
this is the perfect fall recipe and super easy too
it’s so good!
This part confuses me. Was the first sentence an error, or do I need to put it on a floured surface and then back in the bowl to create the seams?
I cant wait to try this! Thanks! 🙂
Hi Deana! Thank you for flagging that- you actually just remove it from the bowl and create the seams/shape. I have updated the recipe. I hope you enjoy it! It is VERY easy to make and super delicious.
Where did you get your dutch oven!
This one is from Le Creuset!
I’ve never made homemade bread before, wish me luck!!!
This is such an easy recipe, you’re going to love it!
I’m 15 yrs old and I found your Instagram, and now I’m here, I’m going to tell my mom to make this recipe
Thank you for the support, Lucie! Let me know how it goes!
I like that you added seeds, looks like a good recipe!
It’s sooo good!
Is this mean’t to be eaten in one day?
You can cut up the loave and freeze the pieces! I only live with my fiance but we eat bread pretty fast hahah